To truly maximize website potential, you should look beyond the visitors already coming to your site and tap into pre-existing contacts in a CRM. By running an effective marketing campaign with these leads, you can generate even more results.
Types of campaigns which can be done using one-off campaigns:
Well, you can run any kind of campaign as long as you have a CSV of contacts and a template for the message that you want to send.
Some of the most common use-cases for one-off campaigns include:
- New product offers notification
- Feedback survey
- Coupon code to loyal customers
- Announcements
- New product launch
- Festive wishes
Setting up the campaign:
Prerequisites:
You'll need a WhatsApp Business / SMS API / Email Service Provider to be able to utilize the full potential of the outbound bot.
You can also purchase these APIs directly from Reply CX.
For further details, you can contact our sales team.
-
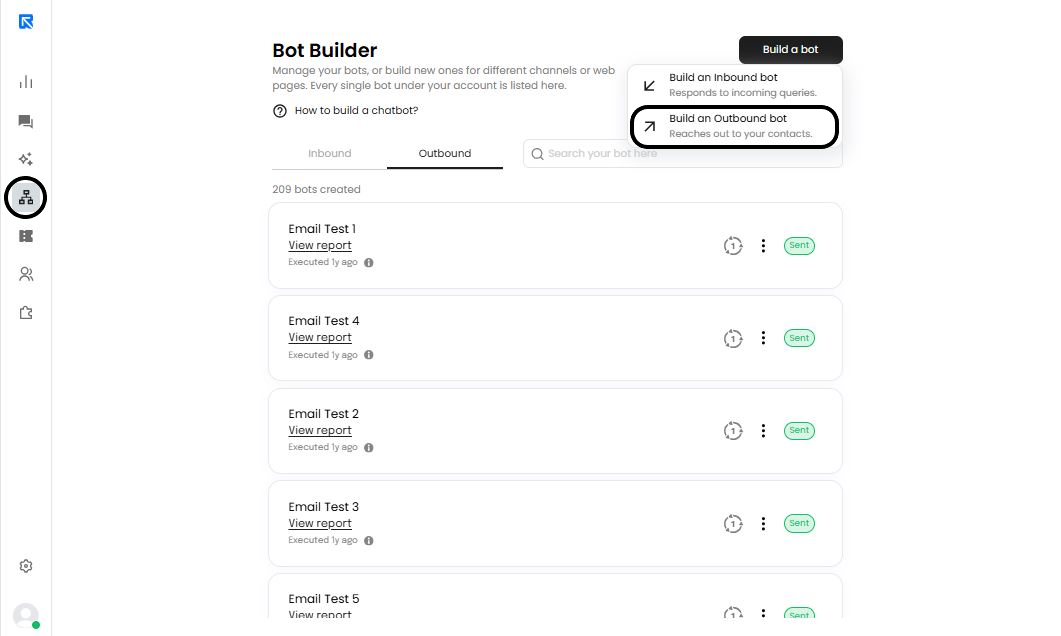
Click on ‘Build a Bot -> Build an Outbound Bot’ from the ‘Bot Builder’ section.
-
Choose ‘One-off’ campaigns, since the campaign will only run once.
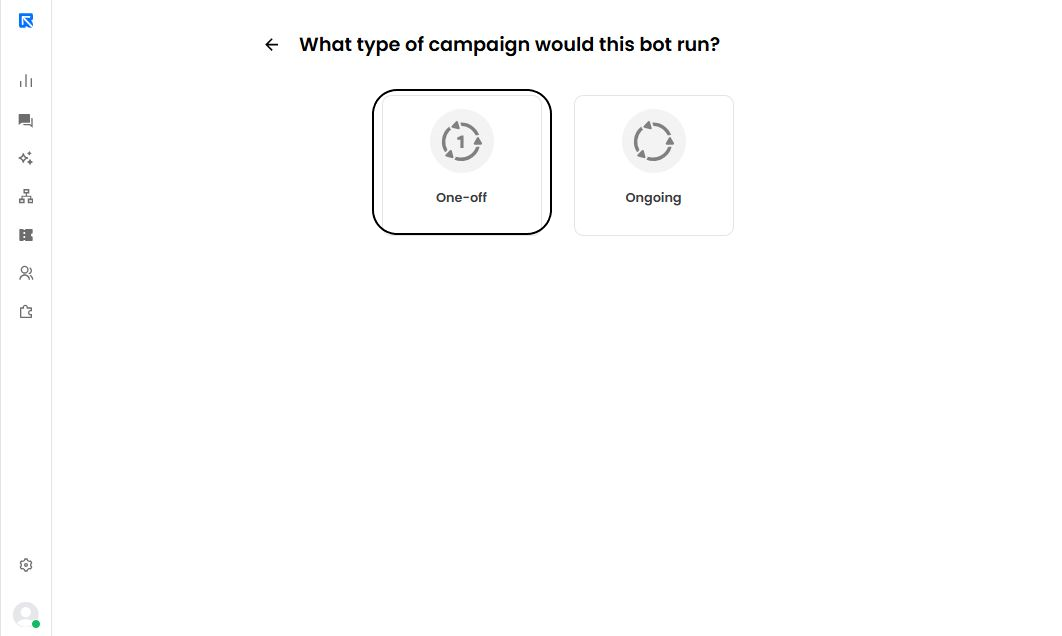
Keep your campaign alive by selecting "Ongoing" to keep contacts continually
&#xNAN;engaged with this program.
-
Click on ‘Trigger’ and upload the CSV file which contains the list of contacts to whom you wish to send the campaign.
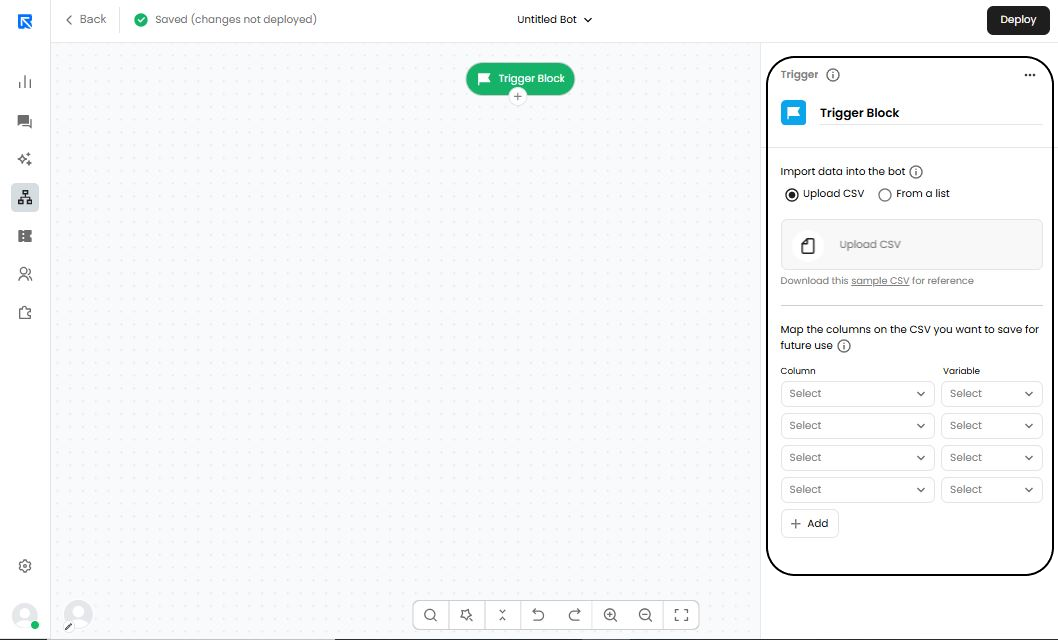
To ensure your message resonates with the intended audience, make sure you incorporate any necessary replacements by importing them into a CSV file.
Reply CX will use the first row of a CSV file to map fields and variables, creating an effective way for businesses to store their data.
- Map the columns that you want to save by giving them a variable name. Generally, these variable names would be the same as the column name which are present in your CSV file.
Ensure that a column with the contact's phone number is included in your data set.
ReplyCX will not be able to function optimally without this critical component in the campaigns.
Avoid errors that could ruin your campaigns - double check all numbers for any blank spaces or parenthesis before running. Incorrect formatting will put a halt to message delivery and lead to total failure of the efforts!
-
Choose the campaigns which you want to send such as WhatsApp, SMS and Email Campaigns. Add the respective action block and configure the their details.
-
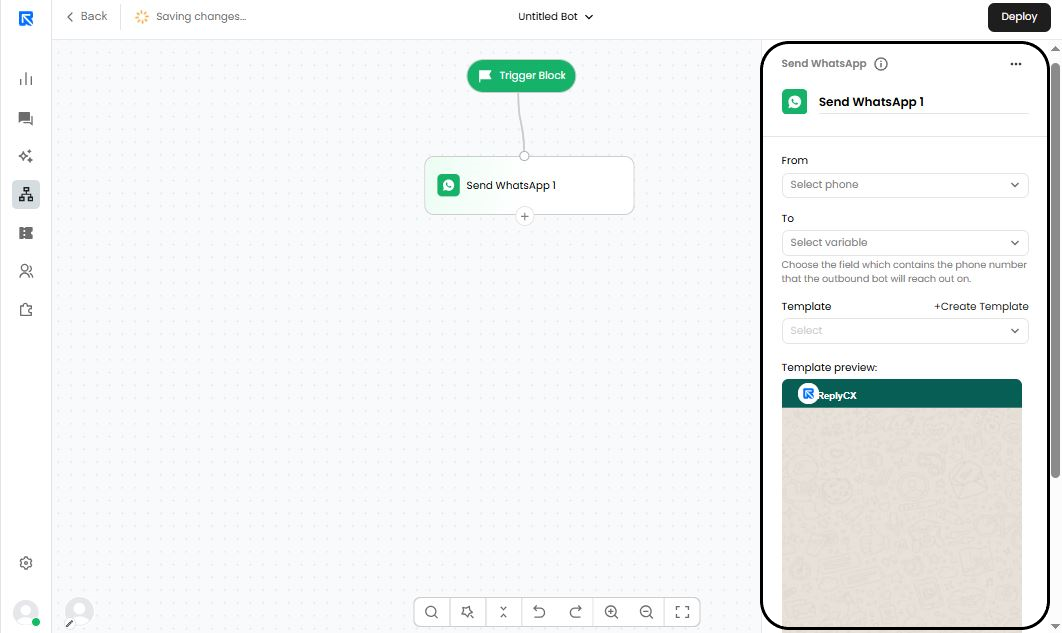
Send WhatsApp:
-
From: Sender ID / Verified WhatsApp Number through which the campaign will be sent.
-
To: Reply onto the same Verified WhatsApp Number.
-
Template Message: Content of the message to be sent.
-
Preview of how the message will look like.
-
Track links in this message: Enables link tracking on the campaign.
-
-
Send Email:
- From: Sender ID / Sender Email through which the email campaign will be sent.
- To: Reply back to the Sender Email.
- CC: Email IDs to be kept in CC.
- BCC: Email IDs to be included in BCC.
- Template: Content of the email to be sent.
- Template Preview: You can view the template to get an idea of the email created.
- Track links in this message: Enables link tracking on the message.

-
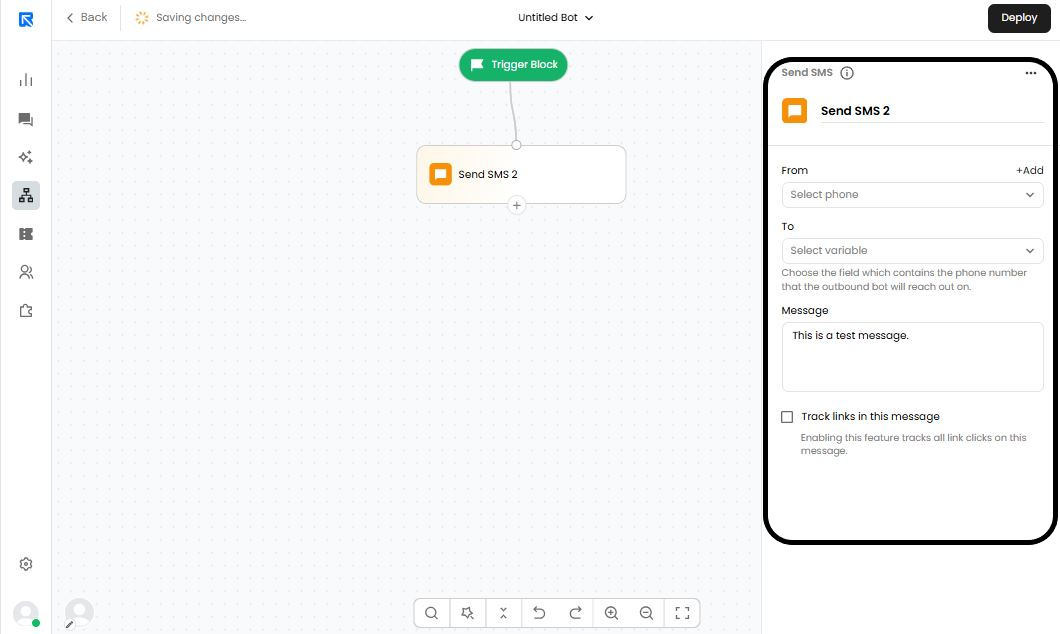
Send SMS:
- From: Sender ID / Mobile Number through which the email campaign will be sent.
- To: Reply back to the mobile number.
- Messages to be sent: Body of the message.
- Track links in this message: Enables link tracking on the message.
-
-
It is a good practice to double check the flow which you have created for any messages with typos or other errors. Once that’s done, just hit “Deploy” to send the outgoing campaign.
A confirmation prompt will be displayed for your final approval before launching the campaign.
-
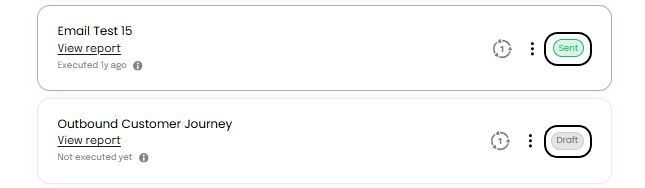
You will be able to see the status of the campaign in ‘Bot-Builder’ section.
- Sent - Campaigns executed and sent along with complete delivery reports.
- Draft - Campaign ready to be deployed.