If you're ready to add some robotic help-mates into your business, chatbots are the perfect way forward! Begin creating a bot in just two simple steps: build from scratch or jumpstart with pre-built templates. With Bot Studio as your starting point, automating tasks has never been easier and more efficient...now go get robotizing!
Types of Chatbots:
- Inbound Chatbots
- Outbound Chatbots
Inbound Chatbots
An inbound chatbot is a friendly virtual assistant designed to interact with customers or users
who initiate contact with a business or organization.
These chatbots can be found on company websites or social media platforms and are programmed to provide prompt responses to customer inquiries, offer product information, schedule appointments, and assist with various customer service tasks.
Building an Inbound Bot:
-
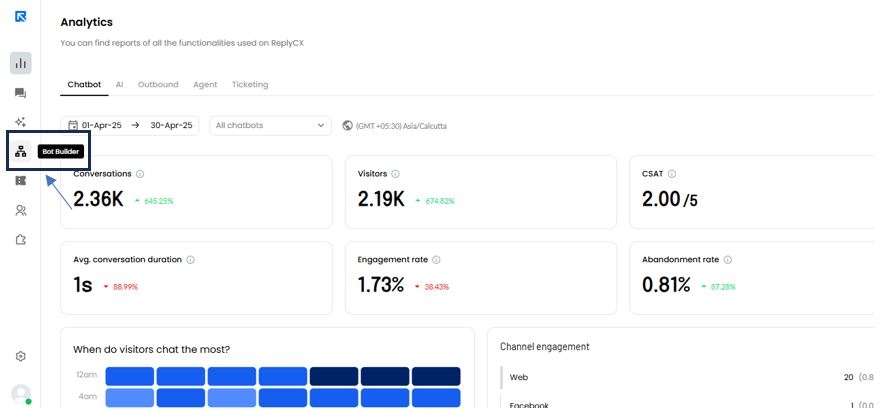
Go to the 'Bot Builder' section on the left panel.
-
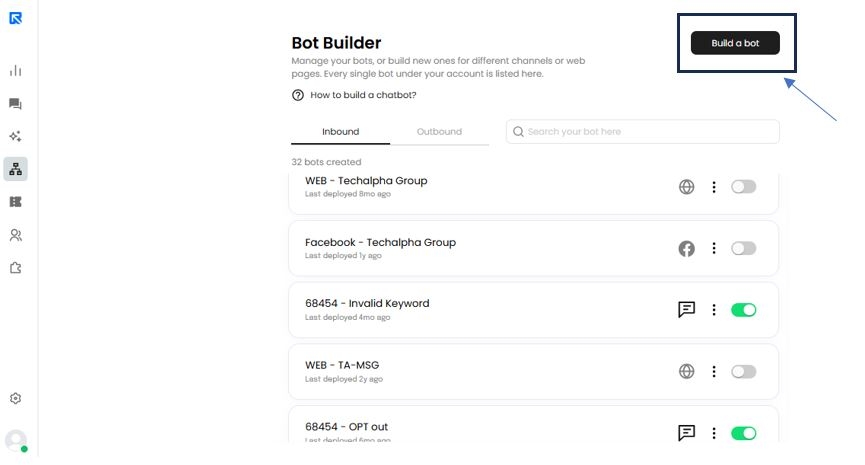
Click on 'Build a Bot' .
-
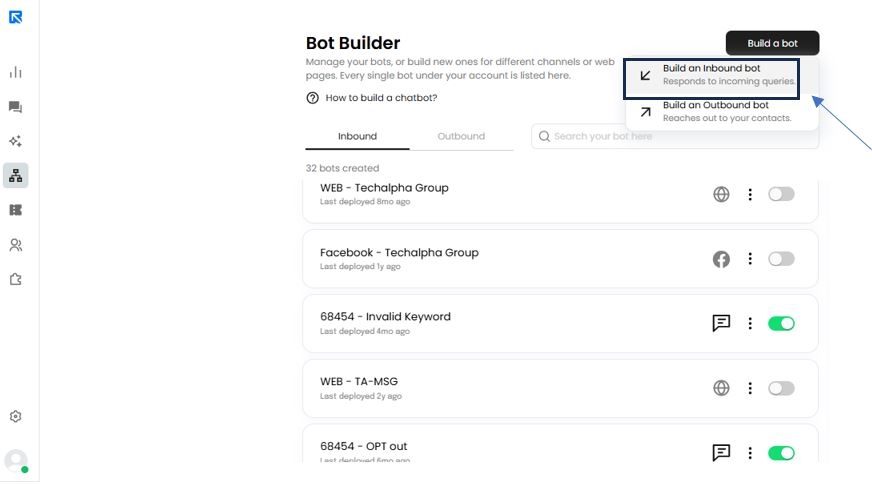
Select ‘Build an Inbound Bot’.
-
Choose a Channel:
Reach your audience where they're most comfortable with ReplyCX! Our platform supports Web, WhatsApp and SMS channel interactions - so regardless of how you construct a bot, it can be tailored to the customer's preferences.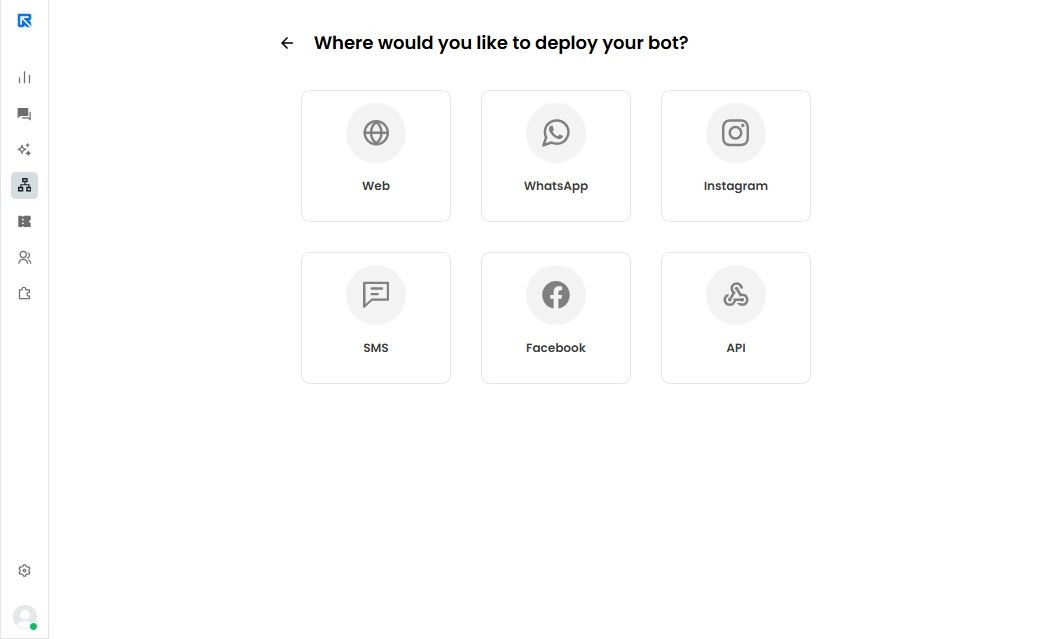
-
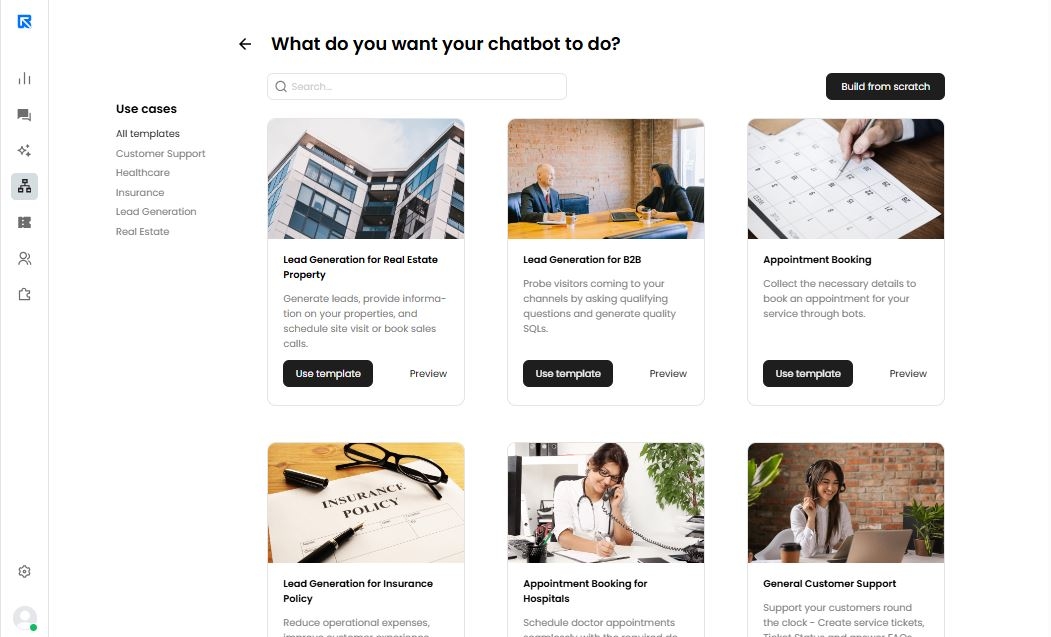
Select the templates of your choice
Begin your bot-building journey with our pre-crafted templates designed by experienced professionals. Select the one that best suits your needs and kick off a smooth and successful project today!Ready to build your bot? After choosing a channel, you'll be taken straight to the Bot Builder page - an important first step that will guide you in constructing automated conversations.
-
Click on Build from scratch.

Having a trigger condition:
With our platform, you can easily create multiple bots that fit with your exact needs.
These specialized tools will show all channel visitors without any need for customization – making it easier than ever before!
With a few simple clicks, you can custom-tailor your chatbot to suit any occasion - so whether it's Christmas and New Year or pricing queries on your website, the right bot will always be at hand.

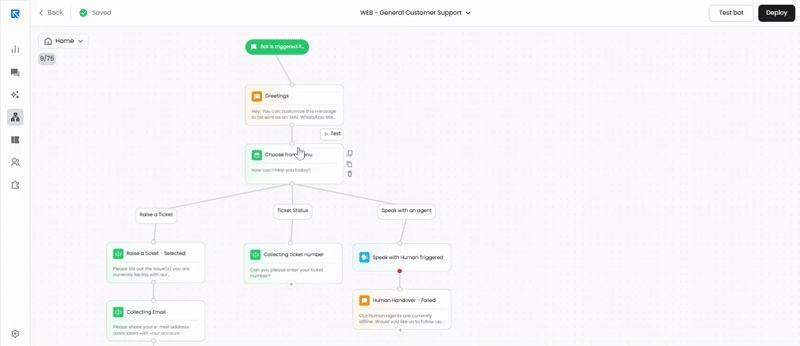
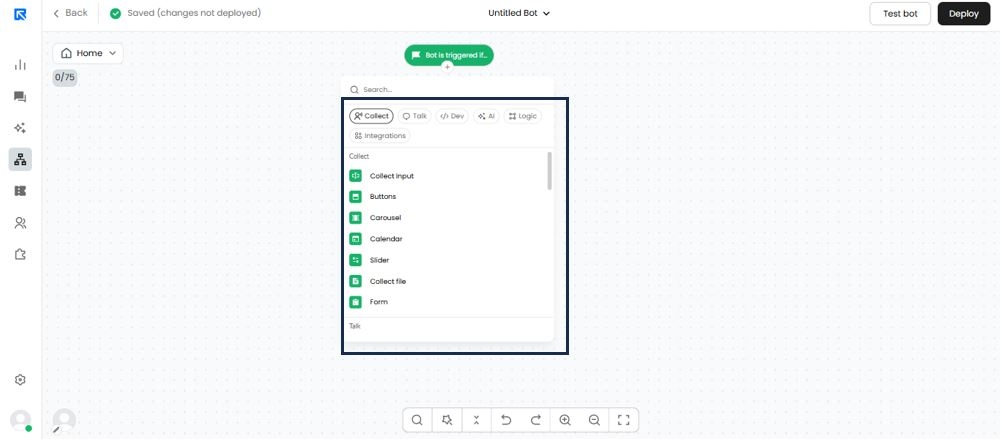
Add Action Blocks:
Bots are designed with interconnected action blocks that enable them to perform their functions systematically - from start to finish. Click on the '+' to unlock endless creative conversation possibilities with a range of action blocks to build your ideal flow.
In this example, we will first greet visitor and collect their contact details to schedule an appointment.
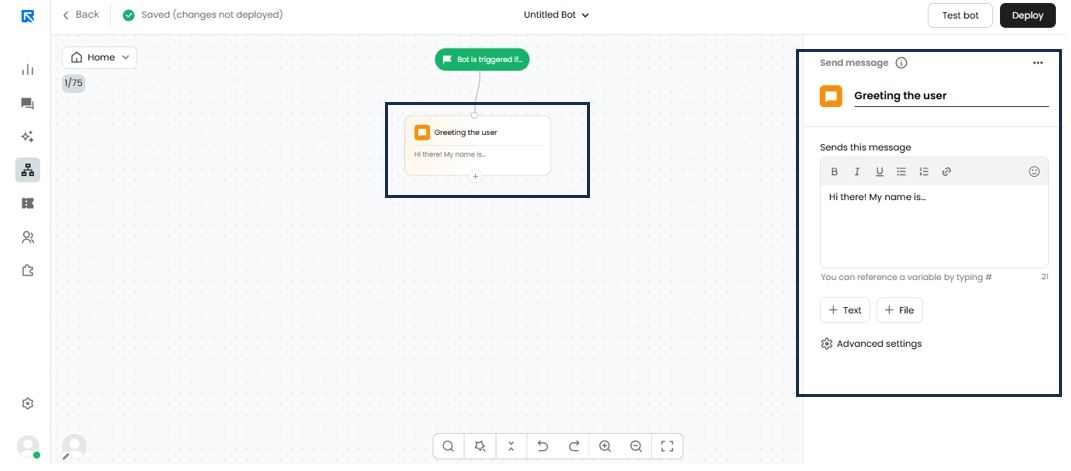
Configuring the action block on the right panel:
To schedule an appointment, we will collect the visitor's name, email, phone, and date of appointment.
Asking their Name:
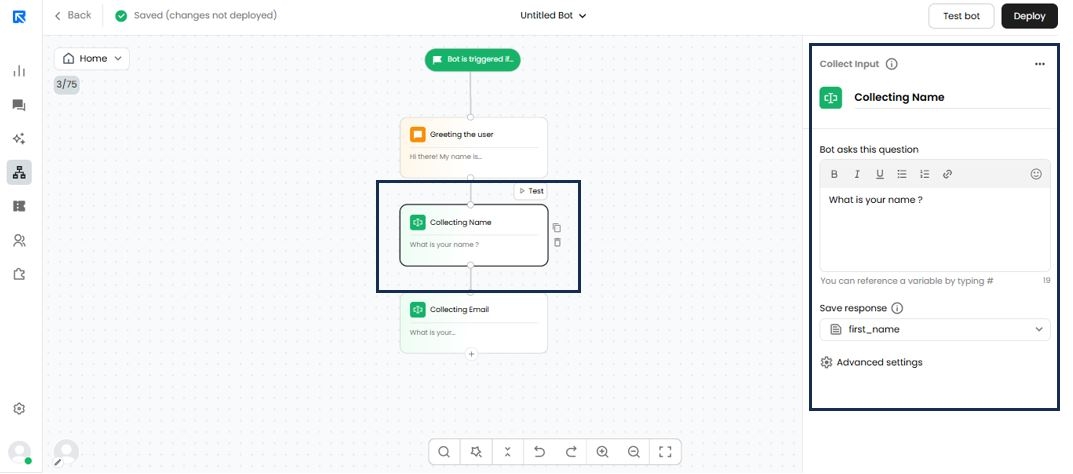
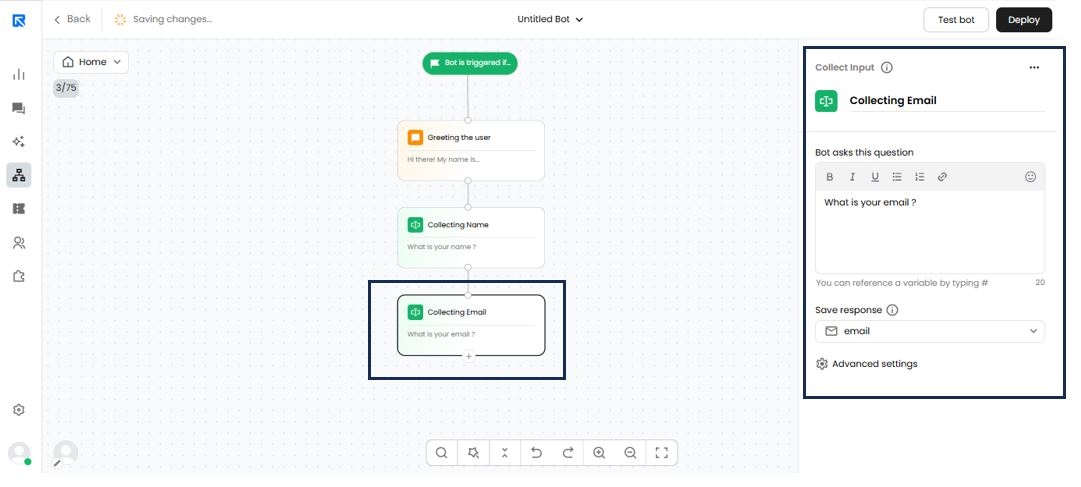
Collecting their Email Address:
Collecting their Phone Number:

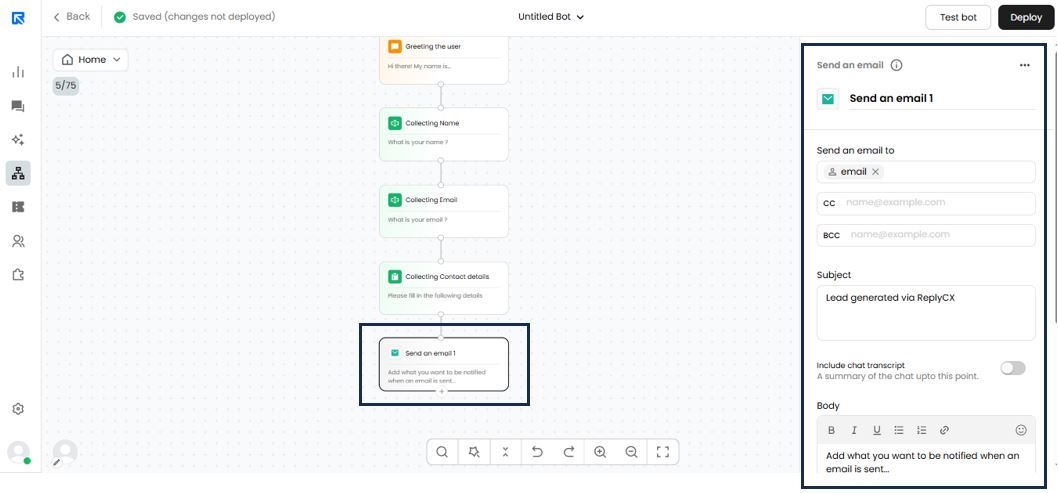
Get notified via email:
Once our bot is done obtaining the essential information, we can leverage an 'Send an email' feature to keep ourselves apprised when a new appointment has been arranged.
This email offers the visitor's choice - a complete chat transcript, or specific details such as name, contact information and appointment date.
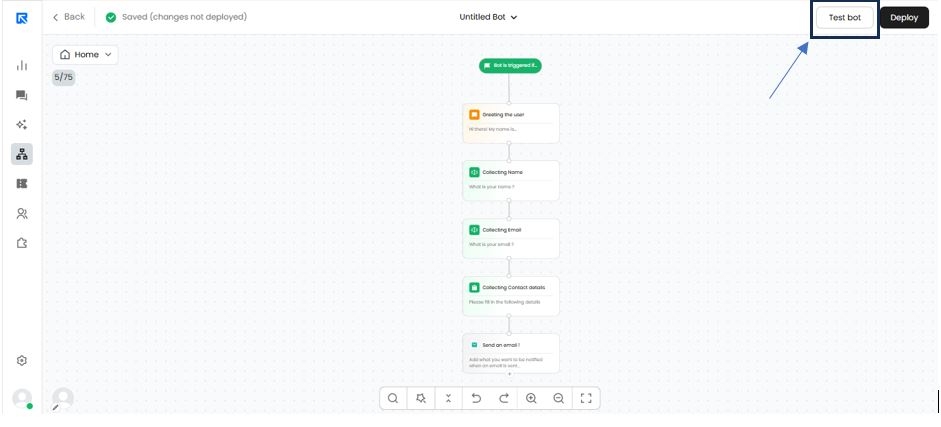
Test your flow:
Once you’re done constructing the bot's flow, click 'Preview' to give it a test run. A window will promptly appear with all your hard work in action!
Make sure to enable pop-ups on your browser in case you don't see the window opening up.
The link is publicly accessible and can be shared with other team members.
Deploy the bot:
To enable your visitors to engage with the bot, you must include ReplyCX's chat interface on your website. Once it is installed, any conversation flows that have been created will be enabled and ready for use!
Take the first step of configuring a channel for your bot. From the left menu panel, simply go to "Channel Configuration" and select your desired choice.
Without the proper channel settings, deploying a bot could result in an unfortunate error. Ensure your configuration is ready before taking action!
To ensure optimal performance, ReplyCX encourages deploying the bot every time changes are made in its flow. Doing this will guarantee you receive an up-to-date and efficient experience!

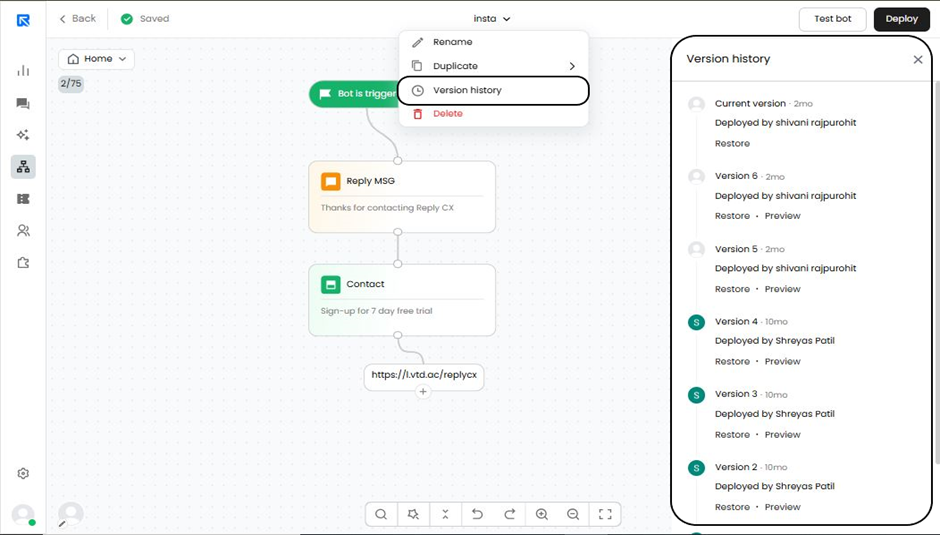
Viewing Bot Version History:
You can view the bot’s version history.
- Open any version to review past configurations.
- Test previous versions directly, making it easier to compare flows, A/B test user experiences, and confidently roll back if needed.
- You can also restore the previous versions.
How to access version history:
- Go to your bot and open a flow.
- Click on the bot’s name at the top.
- Select version history from the drop down menu.
- Browse through all previous versions, restore, and test and compare the changes.
Copy paste Bot Flow
You can copy entire sections of your bot flow directly from the canvas and paste them into any other bot or even into another account using simple keyboard shortcuts. This makes it much faster to reuse logic, duplicate flows, and speed up bot building across environments.
How to Copy & Paste Bot Flow Sections:
- Hold the Shift key, then left-click and drag on the canvas to select the blocks you want to copy.
- Press Ctrl + C to copy the selected blocks.
- Go to the bot or account where you want to add them.
- Right-click on the canvas and select Paste, or press Ctrl + V to paste the copied blocks.