
With ReplyCX, you can deploy a bot on various channels including:
- Website
- SMS
- API
- Voice
Website
To successfully implement a chatbot on your website, Reply CX's code snippet should be integrated into the tag of a reusable component such as the header/footer.
Doing so will ensure that visitors to any page on your site can access and interact with it seamlessly.
-
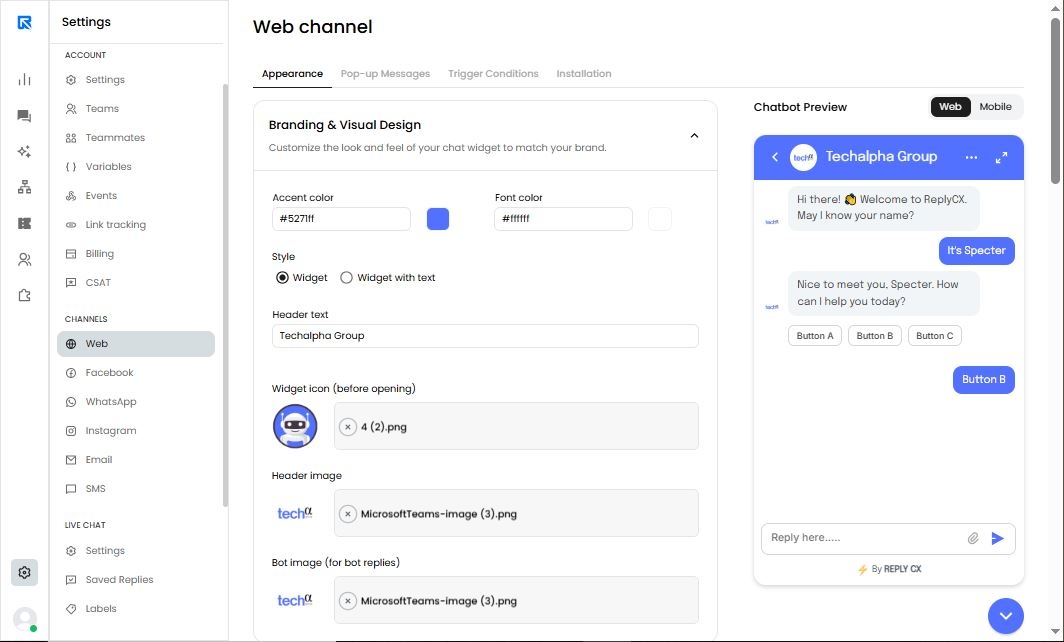
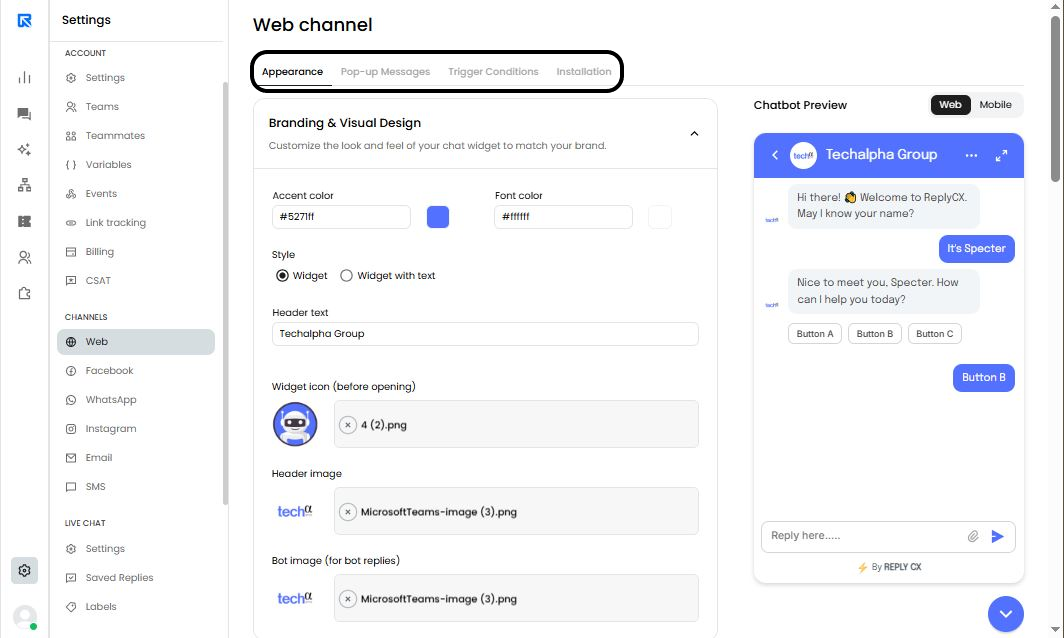
Go to 'Settings' --> 'Channels' .
-
Click on web channel.
-
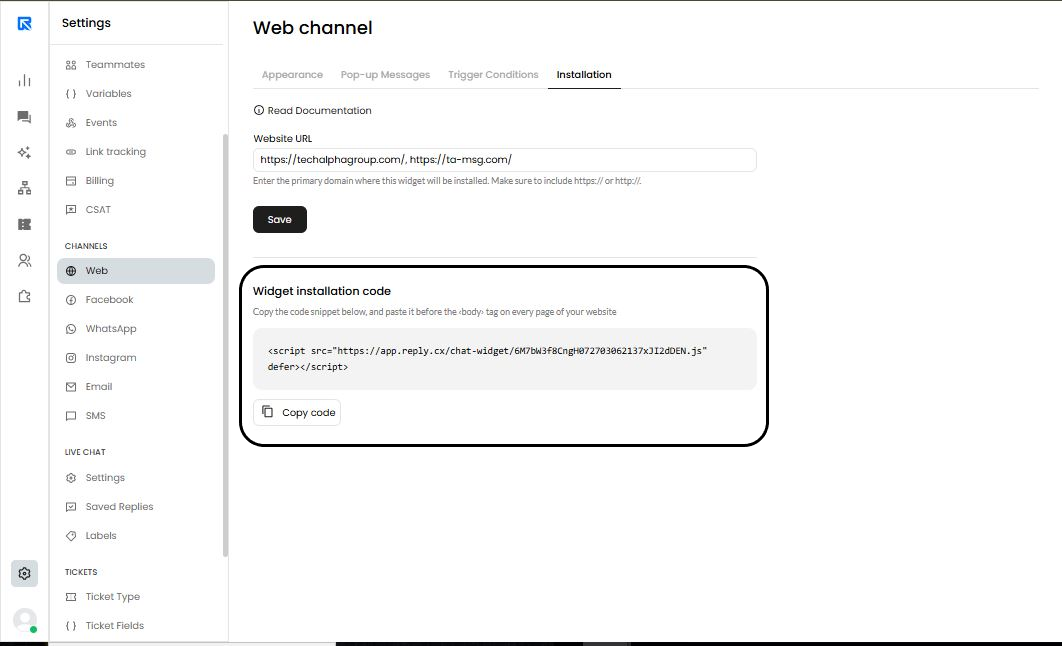
Enter the domain address where you would like to add the chat widget.

We have a domain restriction logic that only allows the chat widget to appear on the domain that you have entered on the ‘Website URL’ field.
-
Copy the code snippet and add it to any reusable component of your website’s HTML file like header/footer.
-
If you’ve followed these steps, the chat widget will be visible on your website. Simply deploy a bot and see your customer interactions get automation at scale.
If you still don't see a chat widget on your website, it must be due to the following reasons:
No bot is created
No bot is turned on
No bot is created for the ‘Web Channel’
Facebook is definitely a popular channel for businesses to automate their customer interactions. Especially for businesses B2C space.
-
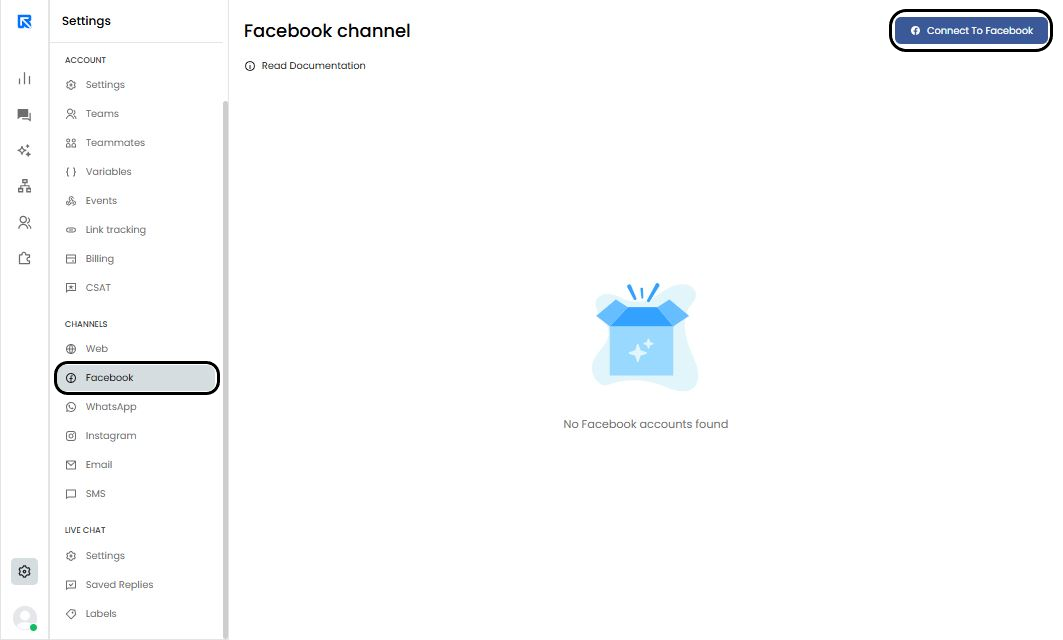
Go to ‘Channel Configuration -> Facebook’.
-
Click on ‘Connect to Facebook’.
Doing so will open a pop-up window requesting to sign in to your Facebook account along with certain permissions to be provided to ReplyCX. -
Select the ‘Facebook Page’ to connect chatbot with.
-
Check the status.
Click on the dropdown and select the bot you would like to map to the Facebook Page.If the bot status is turned on then you will see ACTIVE displayed on that page.
If the bot is turned off, you will see INACTIVE .
WhatsApp is the go-to messaging app for billions of people worldwide, boasting an impressive user base that spans all corners of the globe.
You can connect your chatbot to a WhatsApp Business account using WhatsApp Business API.
In case you do not have one, you can contact our sales team for further queries.
They will assist you in getting the same.
-
Go to the "Settings" --> ‘Channels’ section.
-
Go to 'WhatsApp'
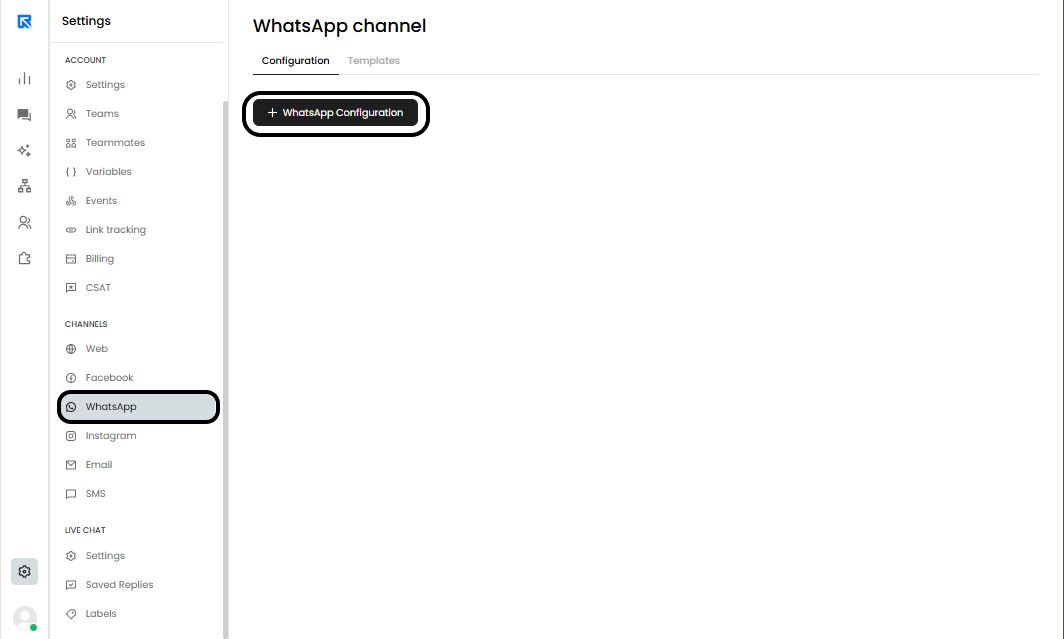
-
Click on the ‘+ WhatsApp Configuration’ button.
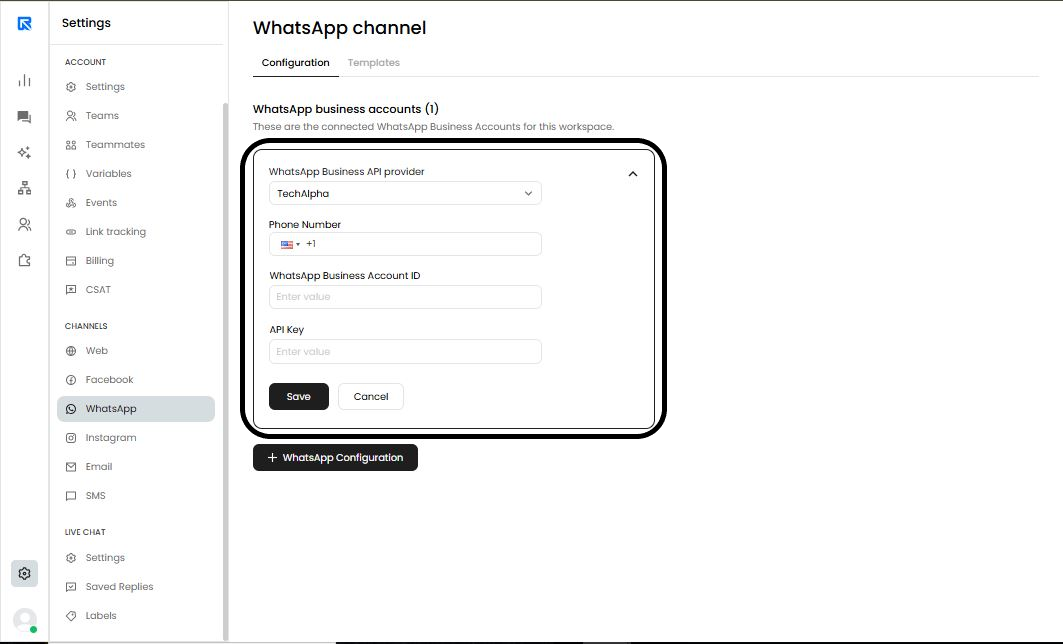
-
Fill the following details:
-
Copy the webhook URL generated
After hitting ‘Save’, you will see a URL generated in the webhook URL field.
Copy and paste this URL on your provider’s portal so that ReplyCX can access incoming messages from your API and provide necessary response from bot
SMS
SMS boast high open rates and are universally accessible, this makes them a reliable tool for reaching a large audience, even those without an internet access.
Here's how you can do SMS configuration on ReplyCX:
-
Go to the 'Settings' --> 'Channels' section.
-
Click on 'SMS':
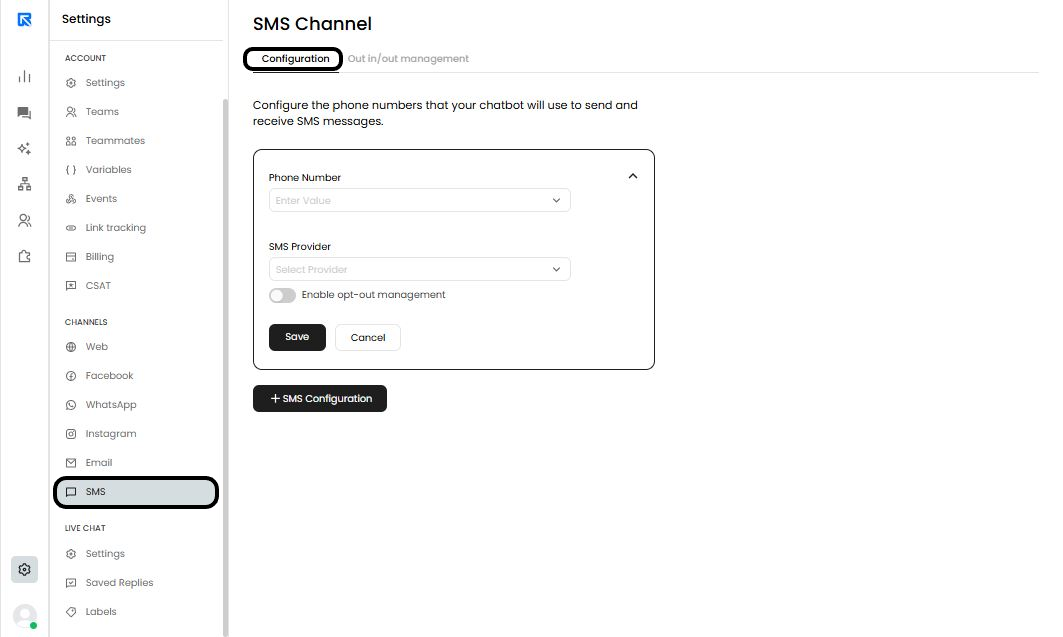
-
Click on '+ SMS Configuration'.
-
Fill up the required feilds:
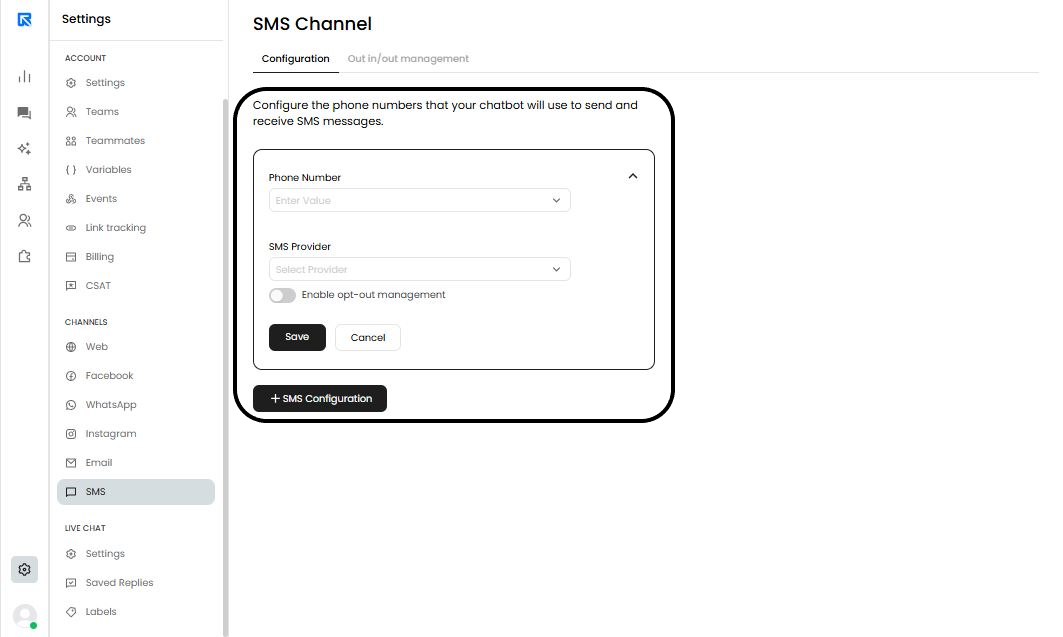
Click on 'Save'.
Done! Now you can start sending SMS campaigns.
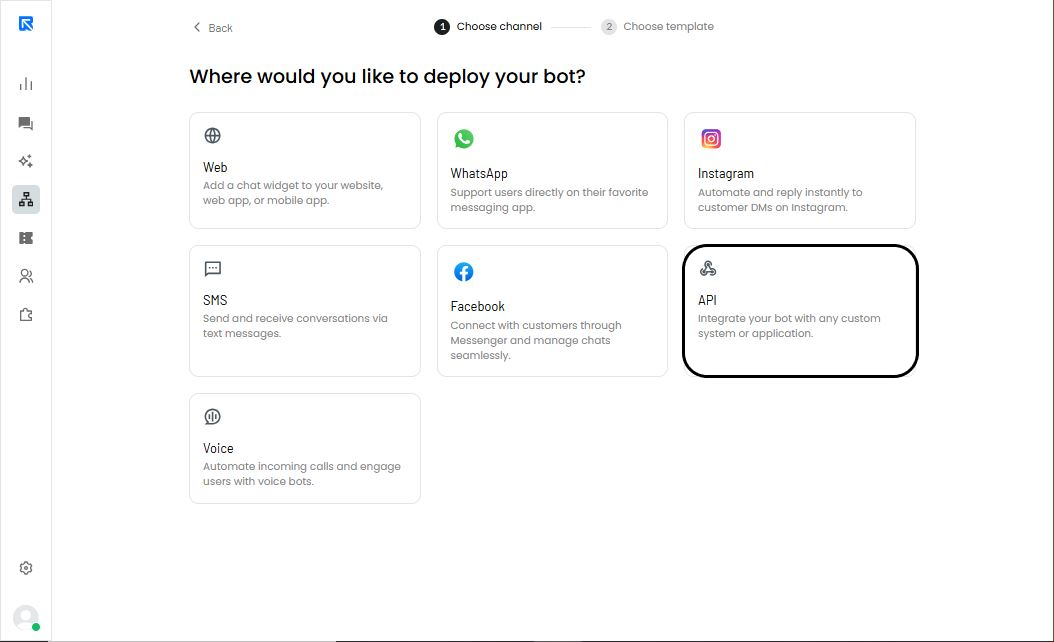
API
ReplyCX now offers API as a Channel, enabling businesses to integrate powerful chatbot automation with their own custom-made chat widget or launcher. This gives you complete control over the user experience while leveraging ReplyCX’s advanced conversational capabilities.
Steps to use API as a channel:
Step 1: Build Your Chatbot Flow
- Navigate to Bot Builder and select "API" as the channel.
- Design your conversation flow to suit your needs.
- Click "Deploy" to publish your chatbot.
Step 2: Configure API Endpoints
To enable seamless communication between your chatbot and your system, you need to integrate two key API endpoints:
- Start Conversation – Initiates the conversation and creates a session.
- Send Visitor Message – Sends the visitor’s response to be processed and moves to the next step in the chatbot flow.
- With this setup, your system can effectively interact with the chatbot while maintaining full control over the UI and user experience.
Start conversation:
This API initiates a chat session with a visitor. Ensure each visitor has a unique identifier.
Endpoint: POST https://api.replycx.com/v1/conversations
Headers:
| Name | Value |
| Content-Type | application/json |
| Authorization | Bearer <token> |
Request Body:
{
"channel": "API",
"message": {
    "data": {
      "body": "Hello" // User's initial message
    },
    "type": "text"
  },
  "variables": {
    "system": {
      "timezone": "Asia/Calcutta",
      "referrerUrl": "https://yourdomain.com",
      "browserLanguage": "en-GB"
    },
    "contact": {
      "name": "User Name",
   "email": "example@domain.com",
      "phone": "1234567890"
    },
    "conversation": {
      "variable": "value"
    } },
  "bot_key": "<bot_key>", // Found on the trigger block in ReplyCX
  "from": {
    "user_external_id": "<visitor_id>", // Unique visitor ID (mandatory)
    "type": "VISITOR"
  } }
Response:
1. 200 – Success
2. 400 – Bad request
3. 401 – Unauthorized (e.g., invalid JWT token)
Send visitor response:
Send all visitor responses received by your system to ReplyCX using this API. Once received, ReplyCX will process the message based on the chatbot flow and provide an appropriate chatbot response.
Endpoint:
POSThttps://api.replycx.com/v1/conversations/<conversation_id>/messages
Headers:
| Name | Value |
| Content-Type | application/json |
| Authorization | Bearer <token> |
Request Body (Text Message Example):
{
"message": {
"data": {
"body": "Hello" // Visitor's message
},
"type": "text"
},
"user": {
"type": "VISITOR"
}
}
Supported Message Types:
- Text
- Button
- Multi-button
- Slider
- File upload
- JavaScript
Response:
Status Code- 200
{
"ok": true,
"message_id": "6HRBshHEcV8P103039226478taGDJQxC"
}
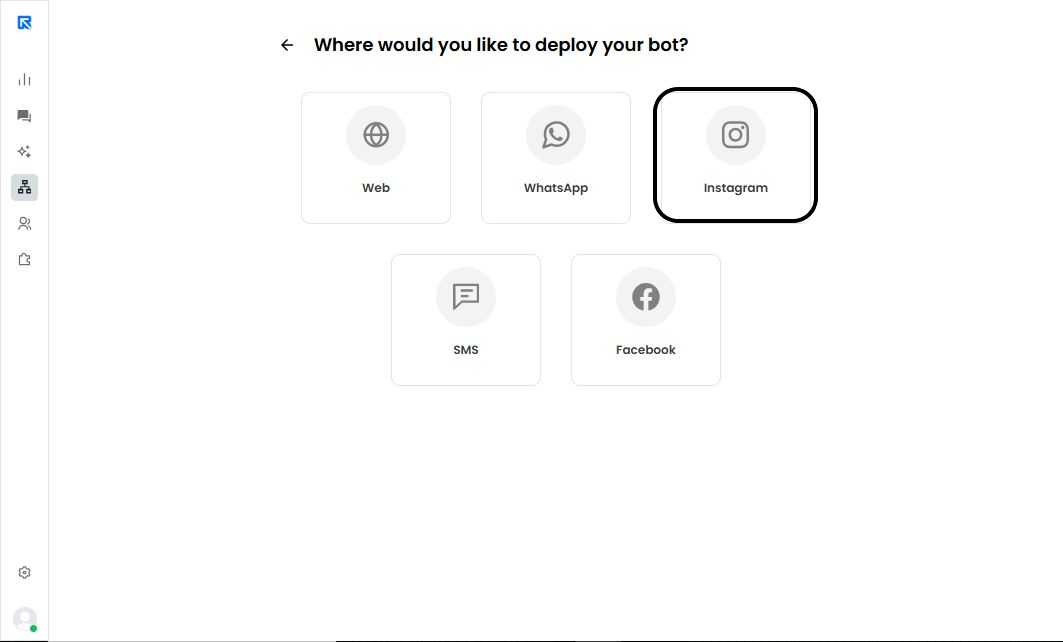
Follow these steps to activate the chatbot on your Instagram business account:
Step 1: Connect Your Instagram Business Account
- Navigate to Channel Configuration > Instagram.
- Click on Connect to Instagram.
A poo-up will appear asking for necessary permissions. Make sure to select all permissions listed to ensure the chatbot functions correctly.
Once you’ve granted all the required permissions, the pop-up will close, and your Instagram business page will be displayed in the configuration section.

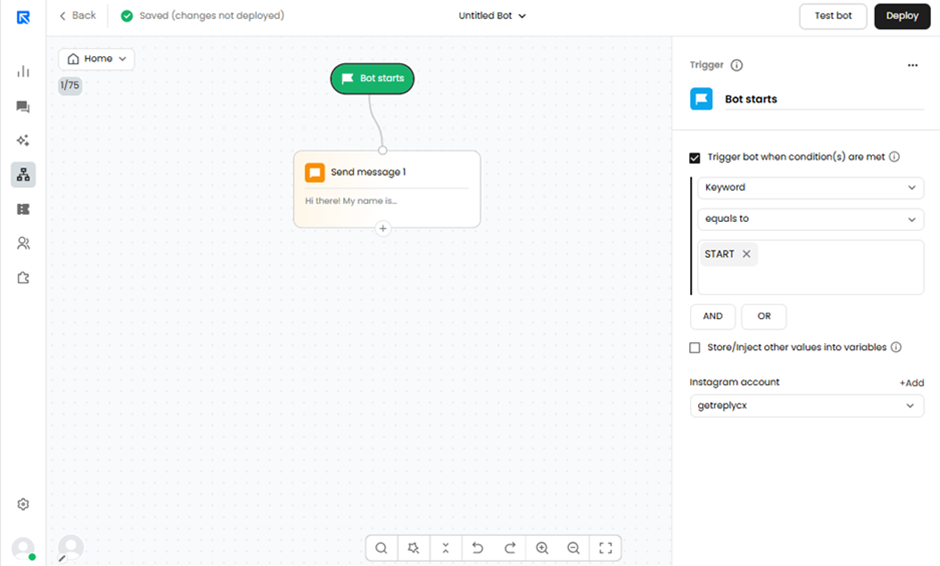
Step 2: Connect the Chatbot to Your Instagram Page
- Open the Instagram chatbot you created.
- Click on the 'Trigger' action block.
In the panel on the right-hand side, select the Instagram business page where you want the chatbot to be active.
After selecting the page, click 'Deploy' to save the configuration. Once deployed, all incoming messages to your Instagram page will be managed by your chatbot.
Selecting Instagram as a channel in bot builder:
Keyword trigger to run a specific bot
We can quickly launch specific bots on our Instagram channel with keyword triggers. Simply define phrases like “GET OFFER” or “START,” and the assigned bot will instantly step in when users send them.
This is perfect for running campaigns, sharing offers, and smoothly guiding users into the right conversation flow.
Voice
Voice As a Channel
To launch the chatbot you built for “Voice” Channel, follow these steps:
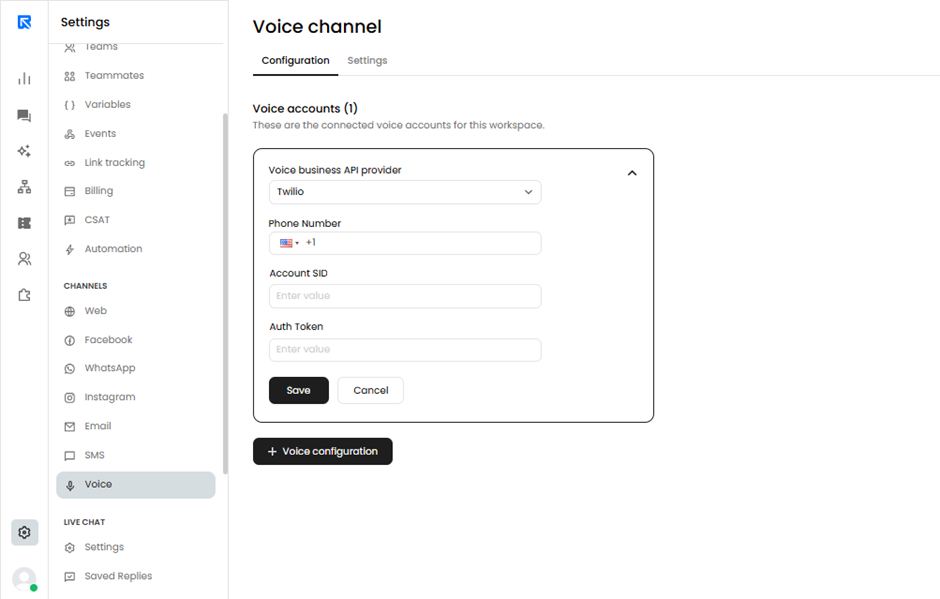
Step 1: Configure your voice phone number
First we will configure the phone number on which all incoming calls will be handled by the Agent.
Currently we only support Twilio as the channel provider.
Go to Settings > Channels > Voice and configure your details.
You can also configure some voice related settings:
- Voice – Choose the voice from variety of options.
- Turn Timeout(s) – The Amount of time the AI Agent will wait for a user reply before moving on the next steps in the chat flow.
- Call Silence Timeout(s) – The Duration of user silence, after that time period the call will be automatically disconnected.
- Max Conversation Duration – Set the total maximum duration of the call / Conversation with the AI Agent.
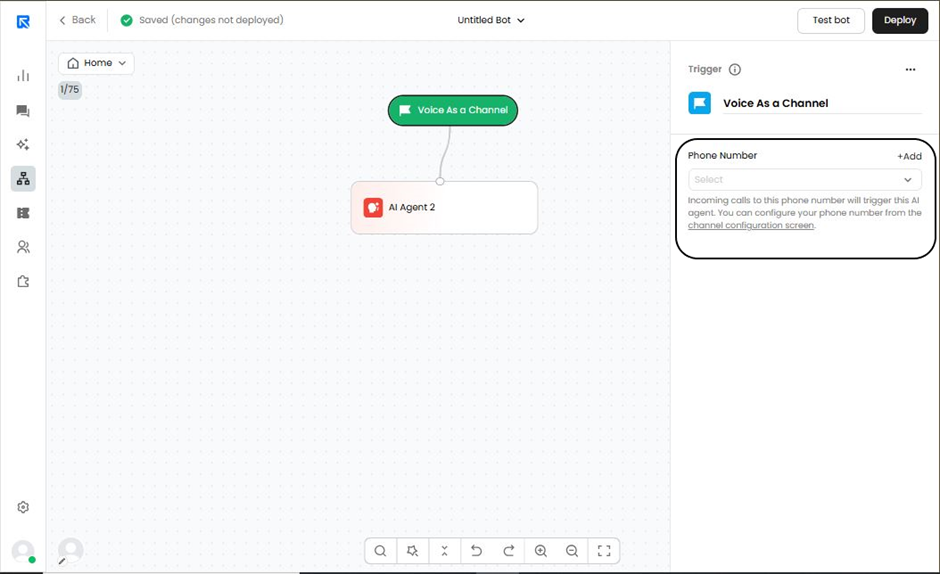
Step 2: Creating voice as a channel bot.
- Select the Voice as a channel in bot builder.
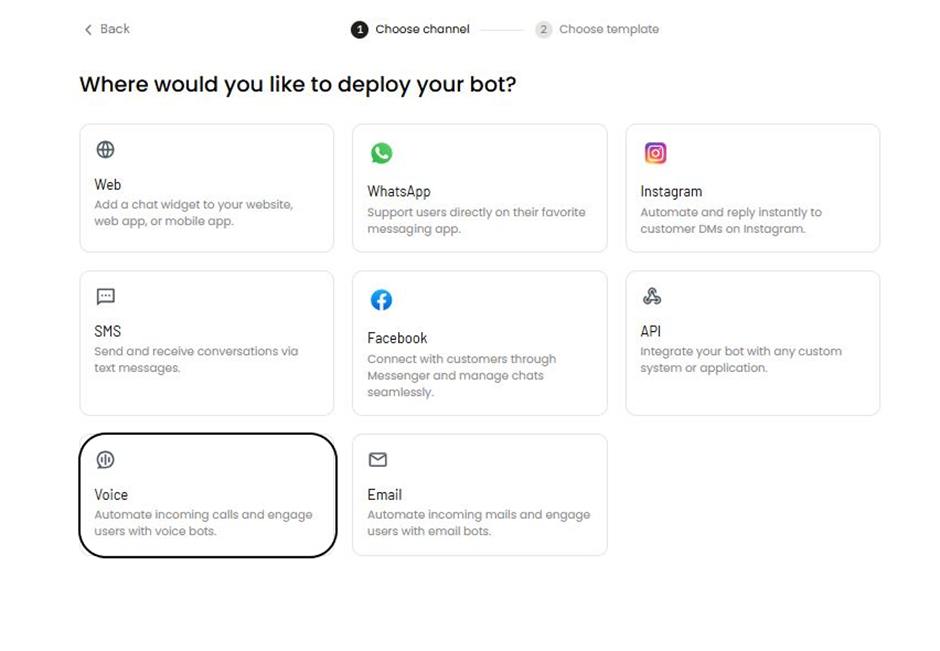
- Click on the bot trigger, and then select the phone number which you need to deploy bot on. (Number should be configured according to the steps mentioned above).
- Voice as a channel works best with AI Agent blocks. Refer the AI Agent block help article to process the flow smoothly.
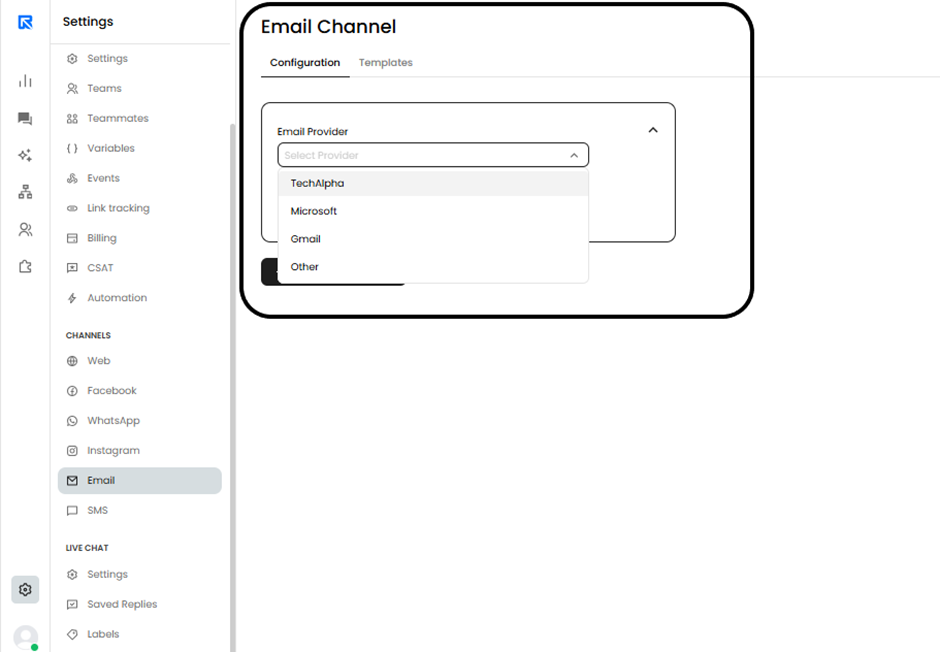
To launch the chatbot you built for email channel, follow the steps below:
Configure the Email Address:
First you will need to connect your email account that will be used to respond to all the received emails through your agent, on that email.
- Go to Settings >> Channels >> Emails
- Click + Email Configurations
- From the drop down , Select your email provider ( E.g. Techalpha, Microsoft, Gmail, Others)
- Enter the required credentials such as email, passwords, and protocol.
- For custom providers you’ll also need to specify server and port values.
- Click Save to complete the configurations.
Once configured, your chatbot will be able to communicate over email using the connected account.
Connect Agent to the Email Address:
Create a bot using email as a channel.
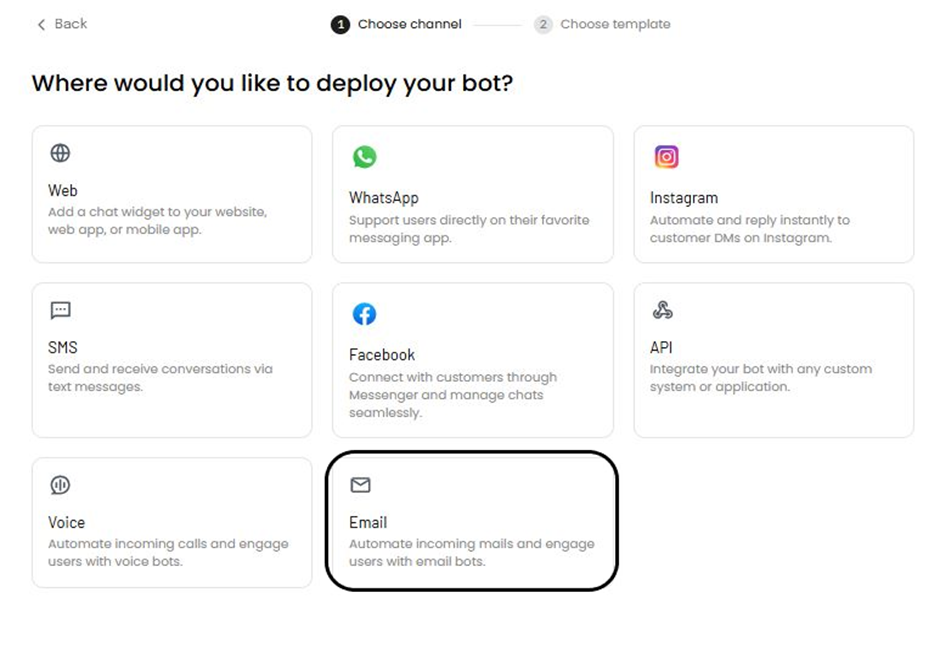
Click on the trigger bot > Configure your email address
Create a chat flow by using the "AI Agent" block, to process all incoming emails on your configured emails by this agent.
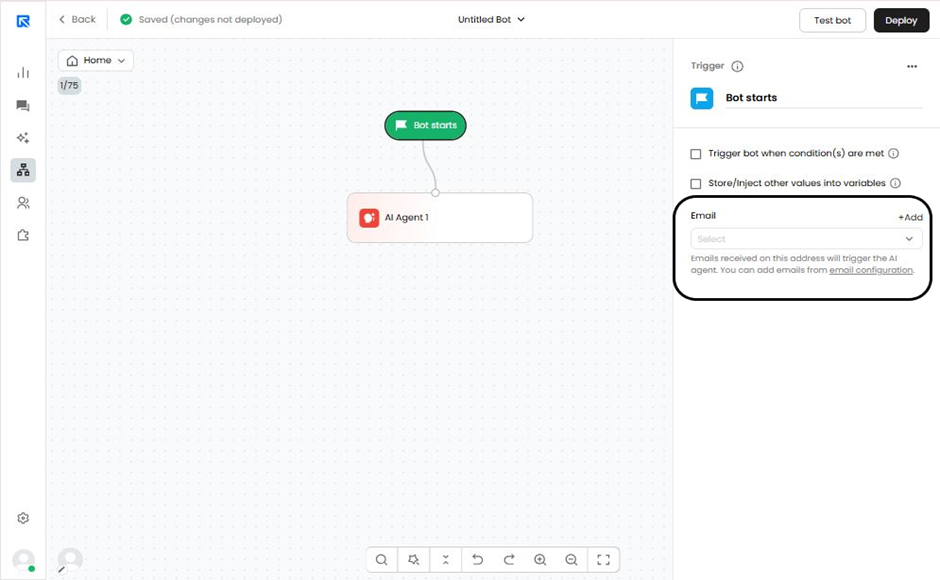
Emails are read in batches of 2 mins. Hence, wait for incoming emails to reflect on the live chat.