About Variables:
Variables are used to store the inputs received from the visitors. ReplyCX recommends its users to use the variables as this provides the insights to them about their visitor’s behavior by running few reports.
Variables come in handy when you would like to capture the details about the visitors and later use it in the flow to make it more personalized & avoid giving the feeling of interacting with the bot to their visitors.
You can also use the variables to track the other details like what options the visitors select frequently, or with the bot to their visitors.
Benefits of using variables:
- Useful in knowing which options visitors choose the most.
- Sending data to third party app like CRM.
- Insights about visitor’s preference
Types of Variables
There are three types of variables that you can use with Reply CX:
- Contact Variables:
A contact variable is a quick way to collect the personal information of the visitors & store it in
ReplyCX for reference. A contact variable can be anything like name, phone, email etc., that uniquely identifies the visitors. - Conversation Variables:
Conversation variables allow you to store the input or the responses received from the visitors.
For instance, asking a particular question to the visitor and storing the response in the variable.
This defined variable will help you in analyzing type of responses visitors provide to the question. - System Defined Variables:
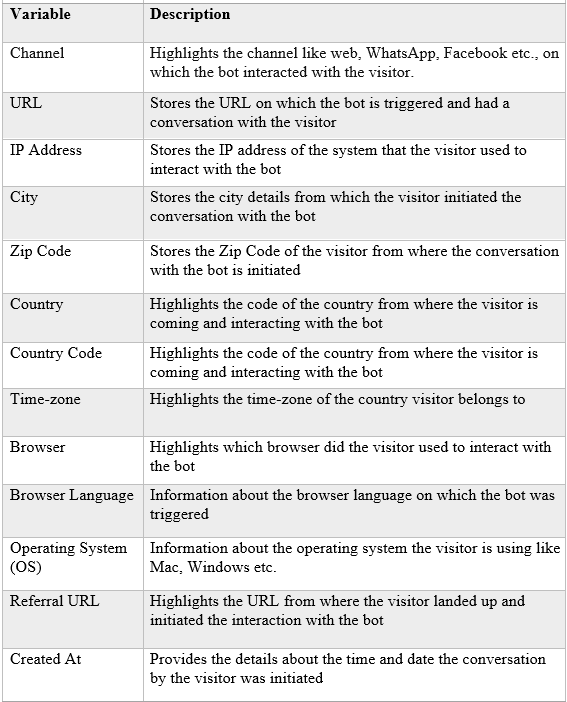
System defined variables are the conversation variables which are generated by the system itself when any new conversation with the visitor initiates or is created in the system.
System Defined Variables:
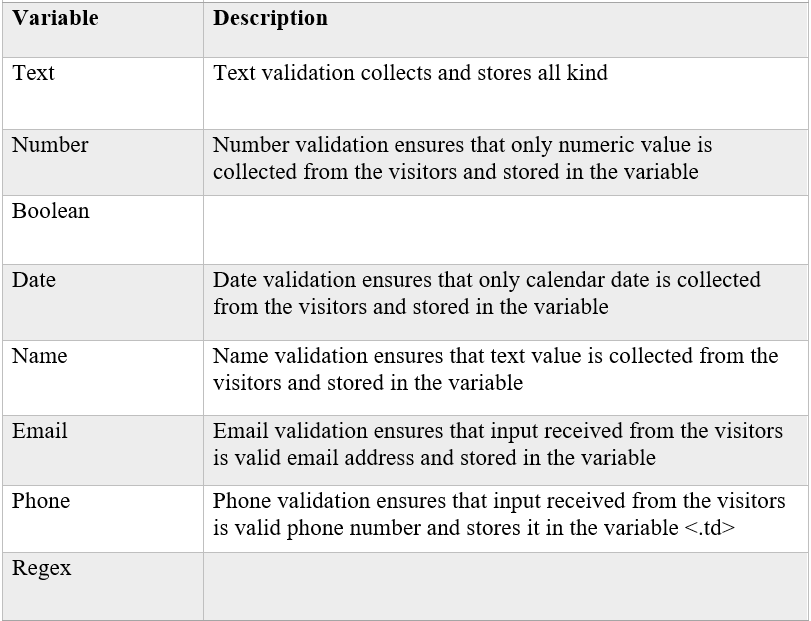
Types of validations that can be used to store the value in Variable:
Create the variables:
There are two ways through which the variables can be created in ReplyCX:
- Through 'Settings'.
- Through 'Bot Builder'.
You can only create Contact or Conversation Variable
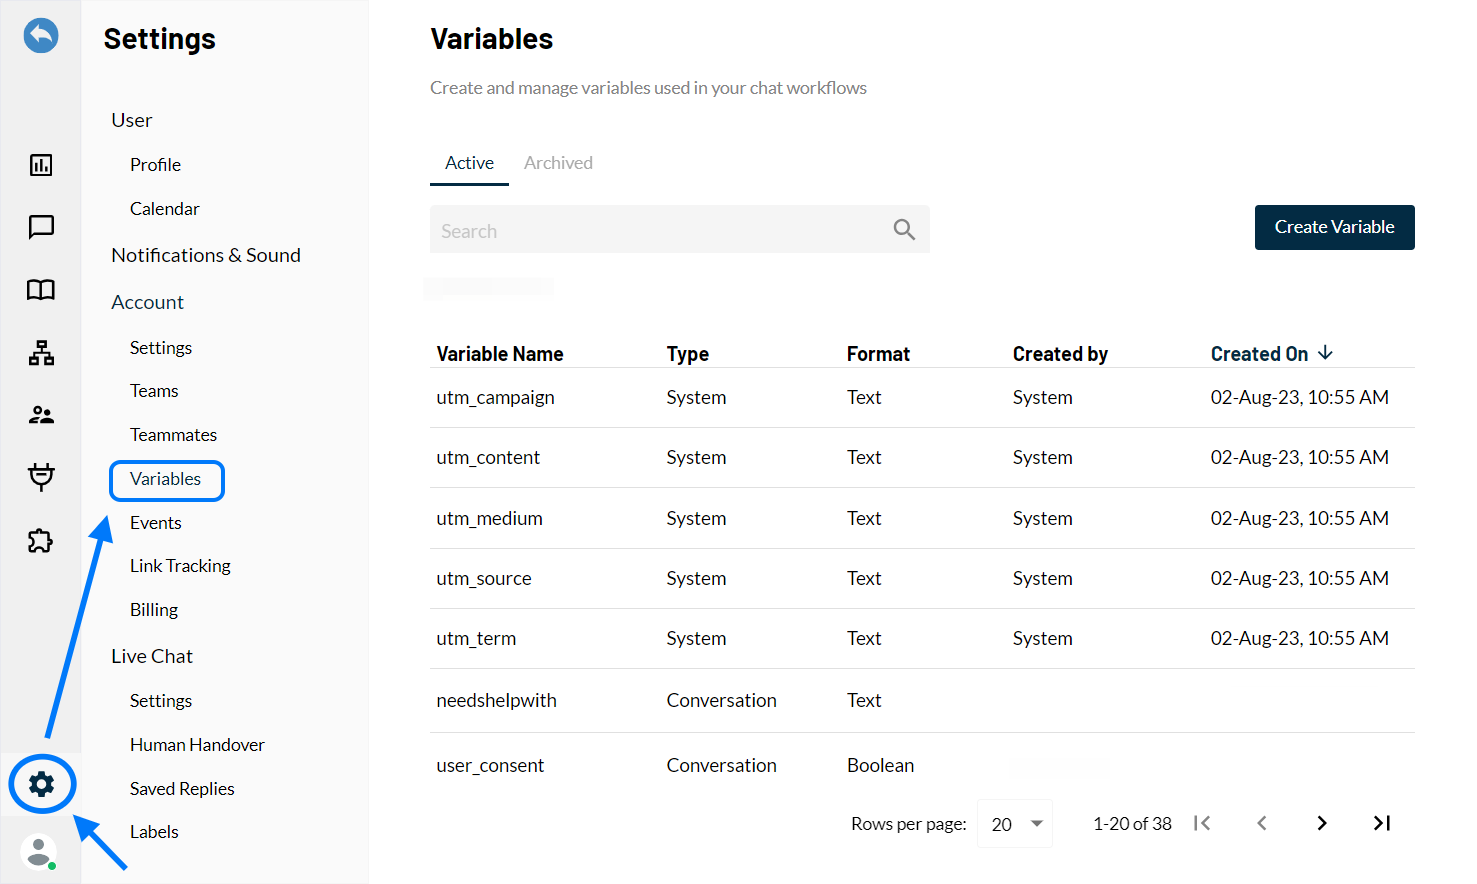
Creating variables through Settings:
-
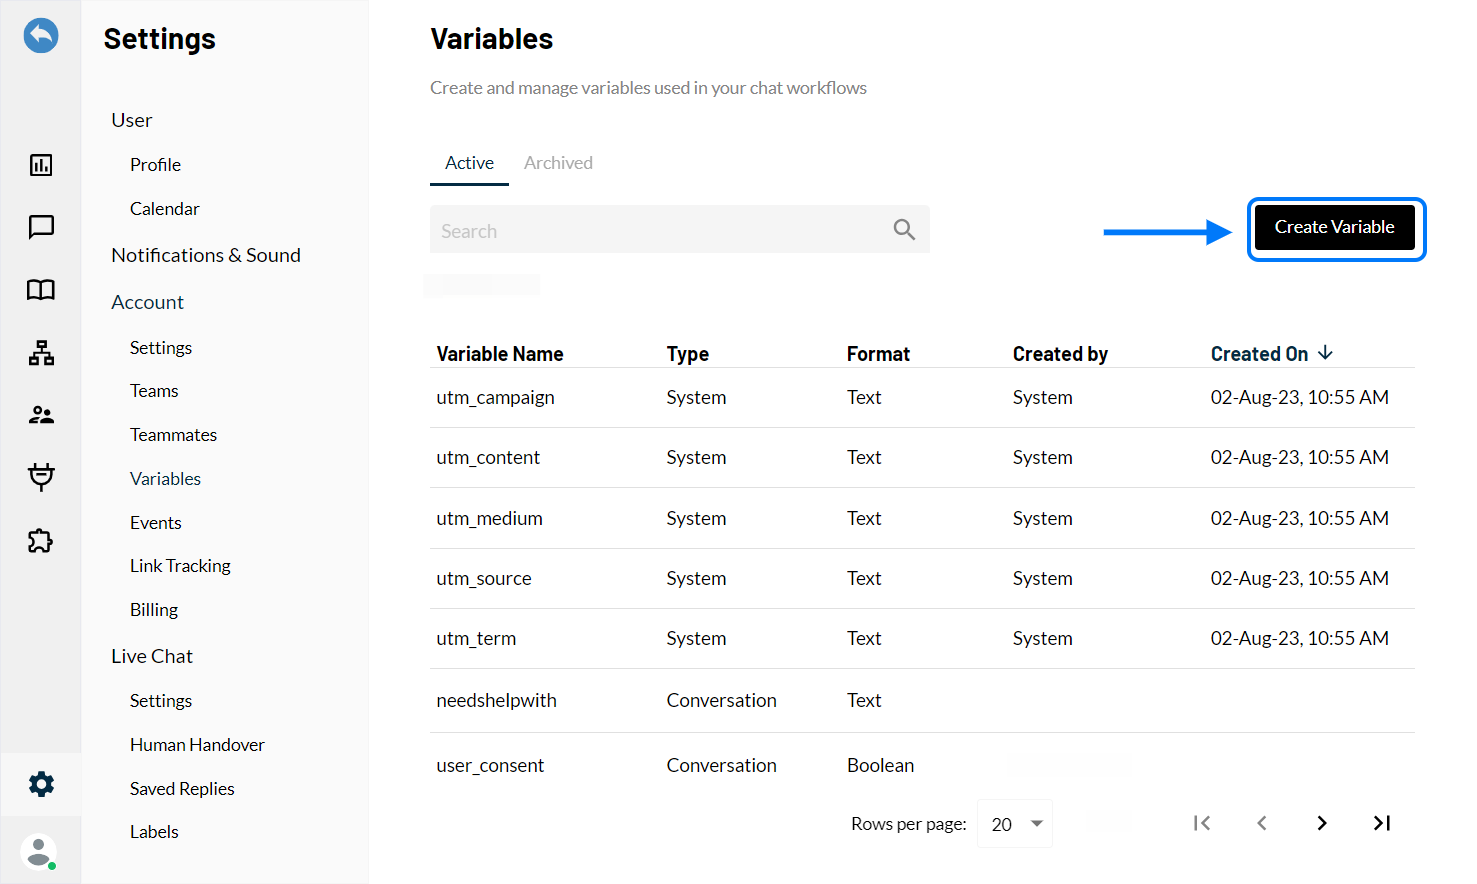
Go to 'Settings -> Variables'.
-
Click on 'Create Variable' button on the top right corner.
-
Select the type of variables you want to create.
It can either be a 'Contact Variable' or 'Conversation Variable'.
-
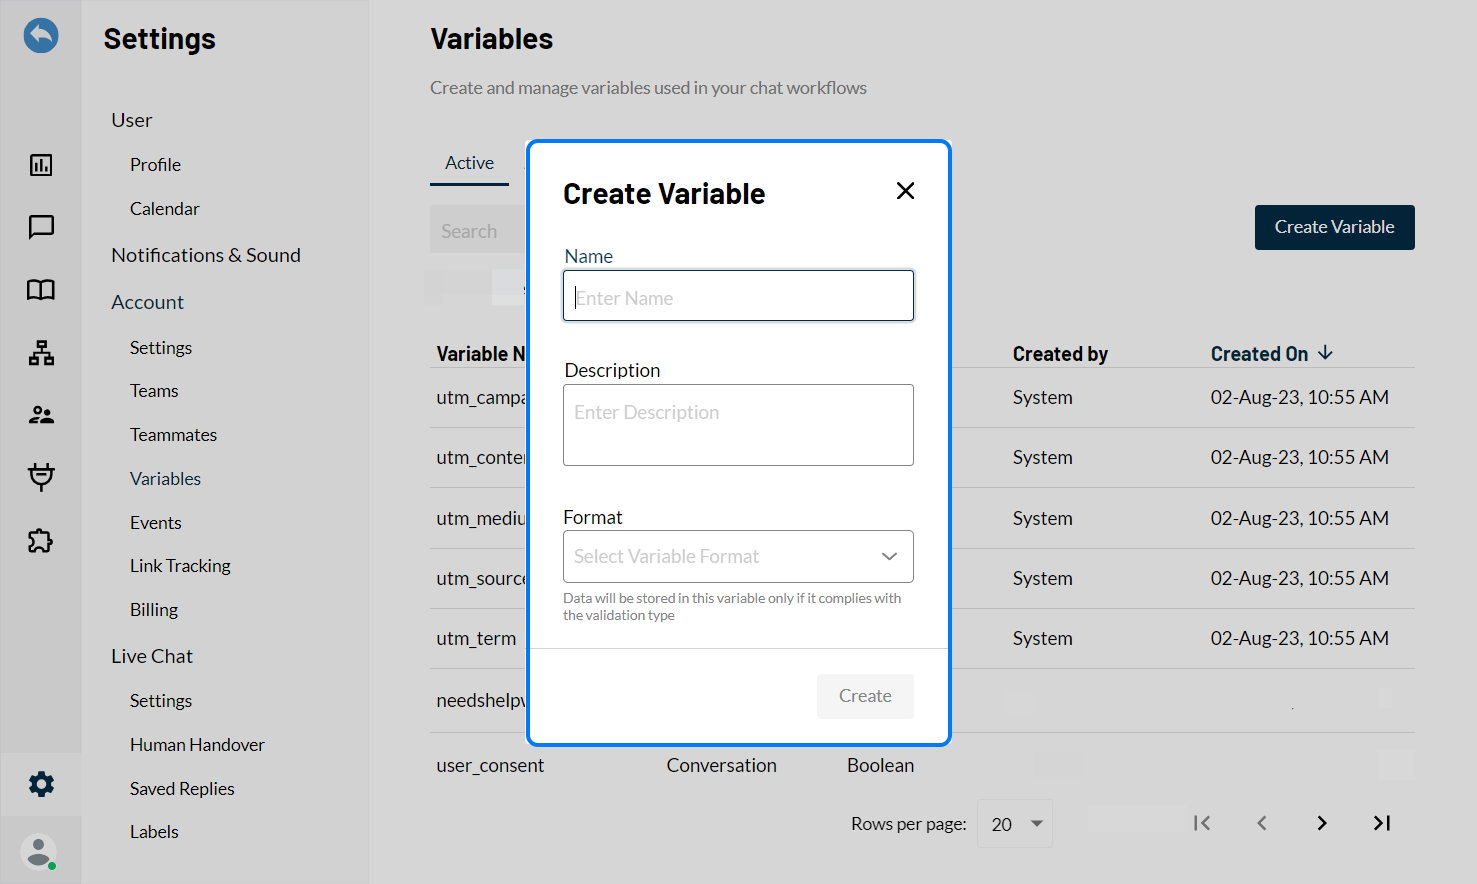
Configure the following:
- Name:
Provide the name of the variable. - Description:
Provide details about the variable in text editor as in what value it stores or what it is used for. - Validation/Format:
Select the format or the validation from the drop-down list as per your preference.
- Name:
Creating variables through Bot Builder:
-
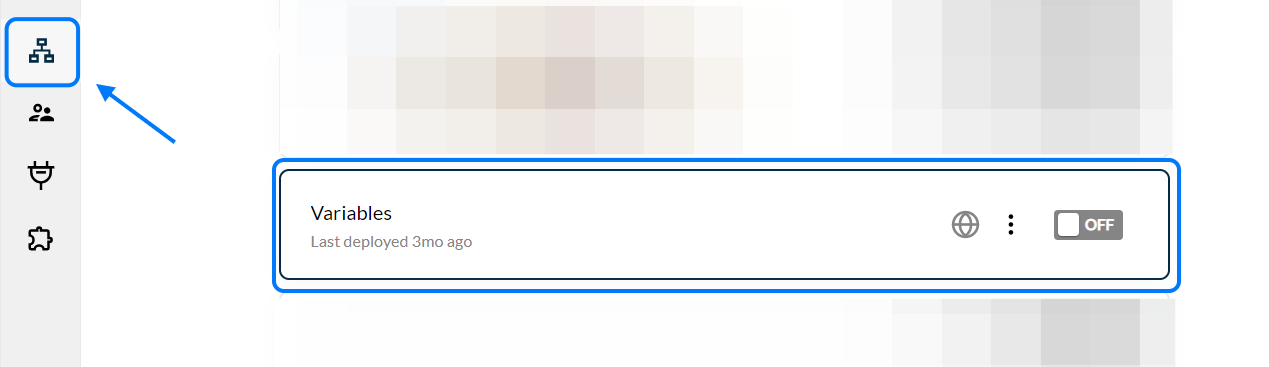
Go to the 'Bot Builder' section and select the bot of your choice.
-
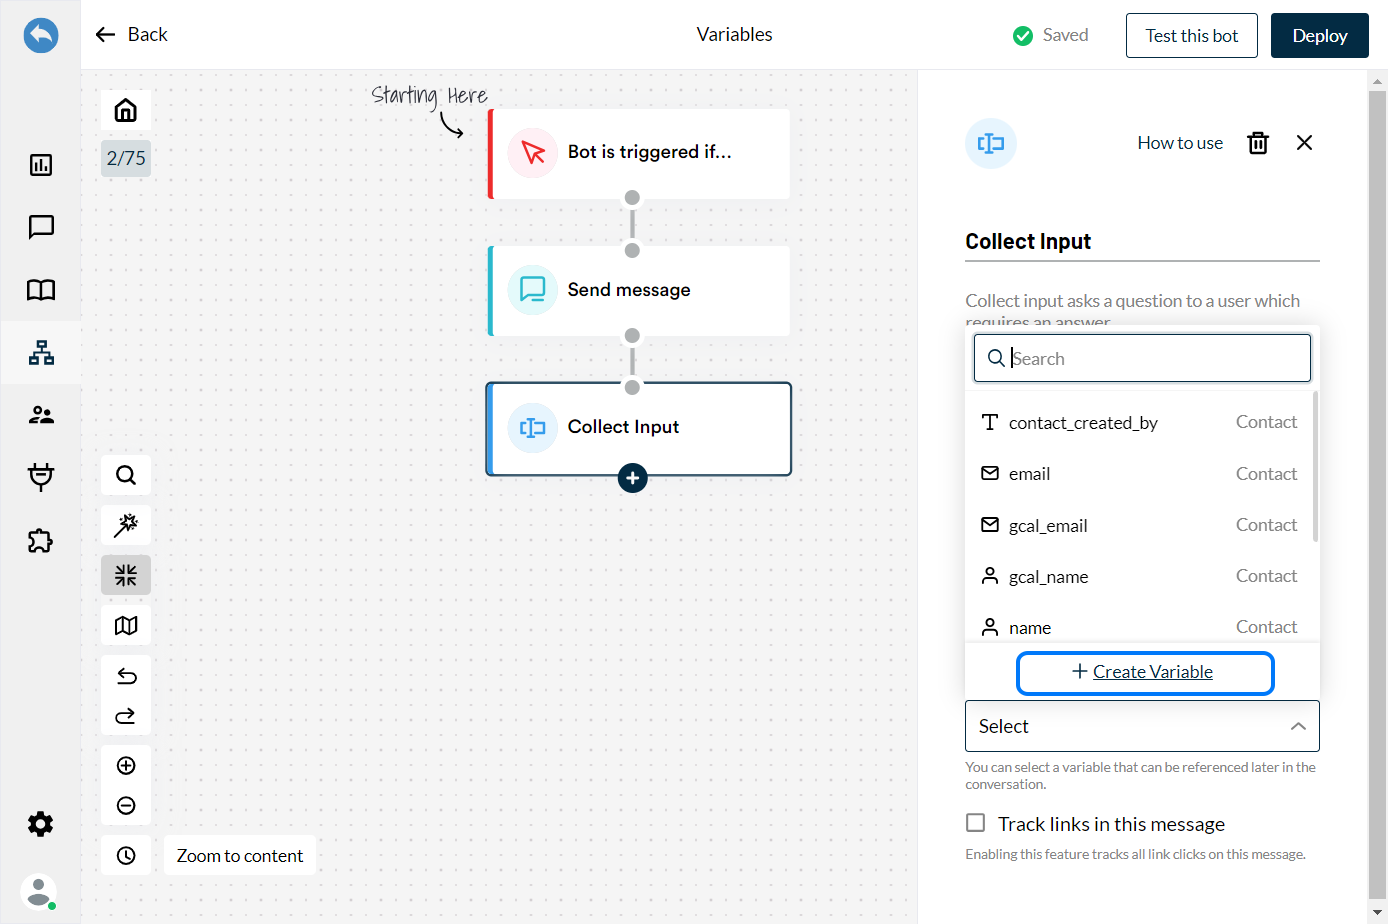
Select any action block that required certain variables to be mapped.
Then click on 'Save the response in this variable' to view the available options.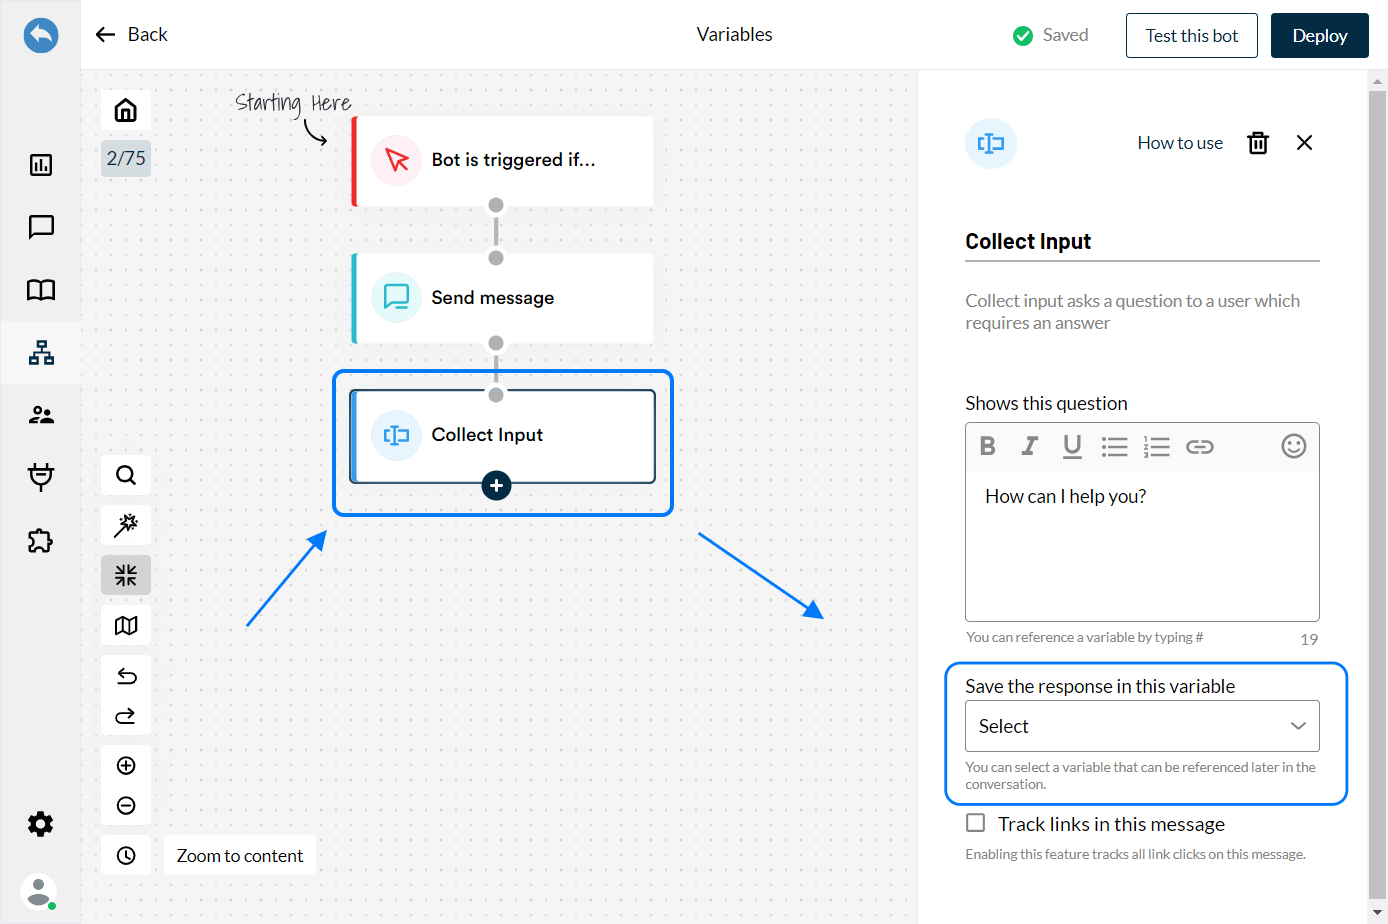
-
Click on ' + Create Variable' to create a new variable.
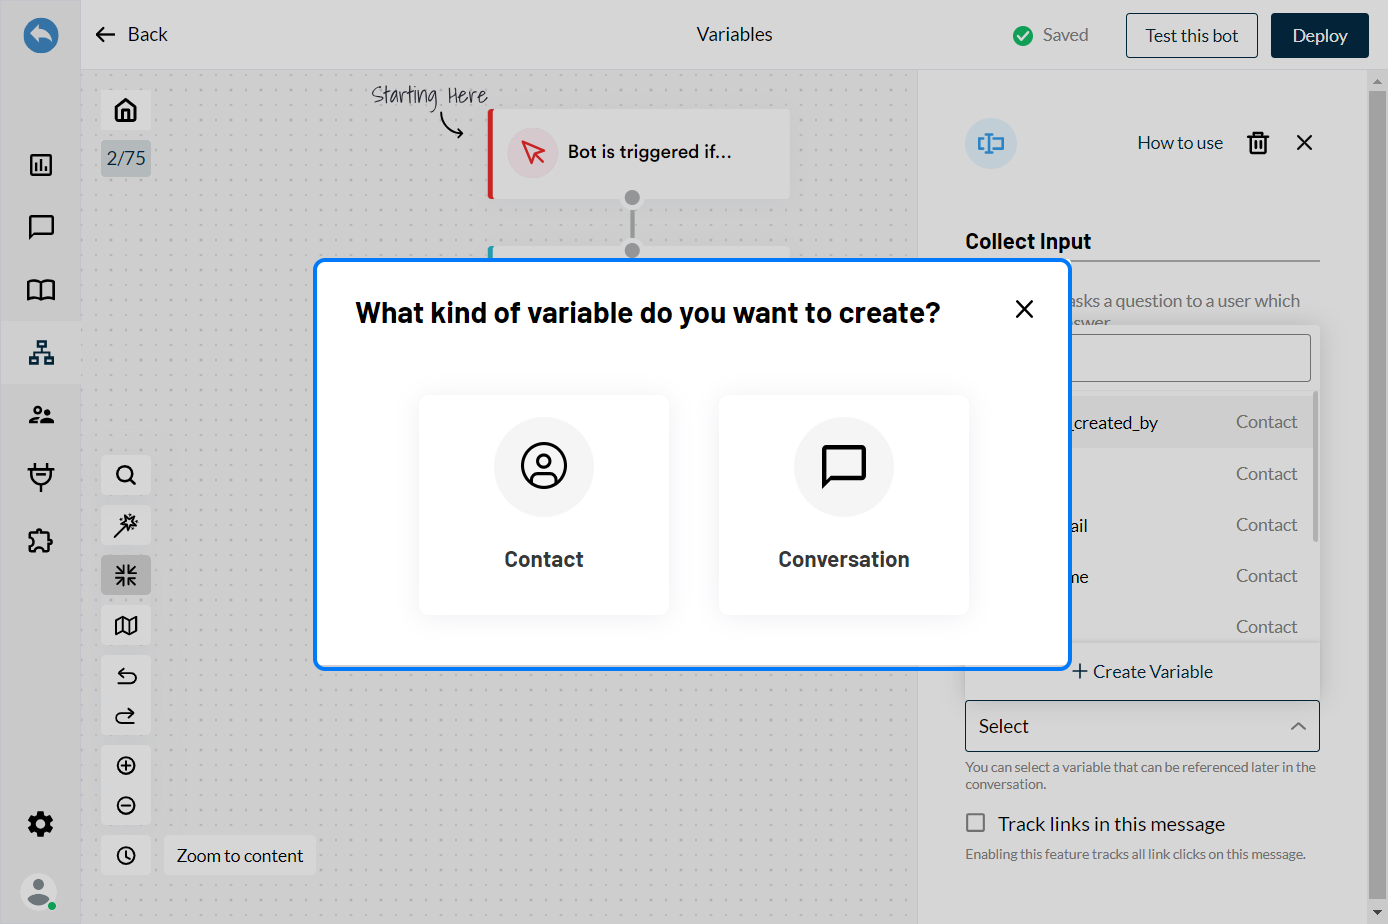
-
Select the type of variables you want to create i.e., a 'Contact Variable' or a 'Conversation Variable'.
-
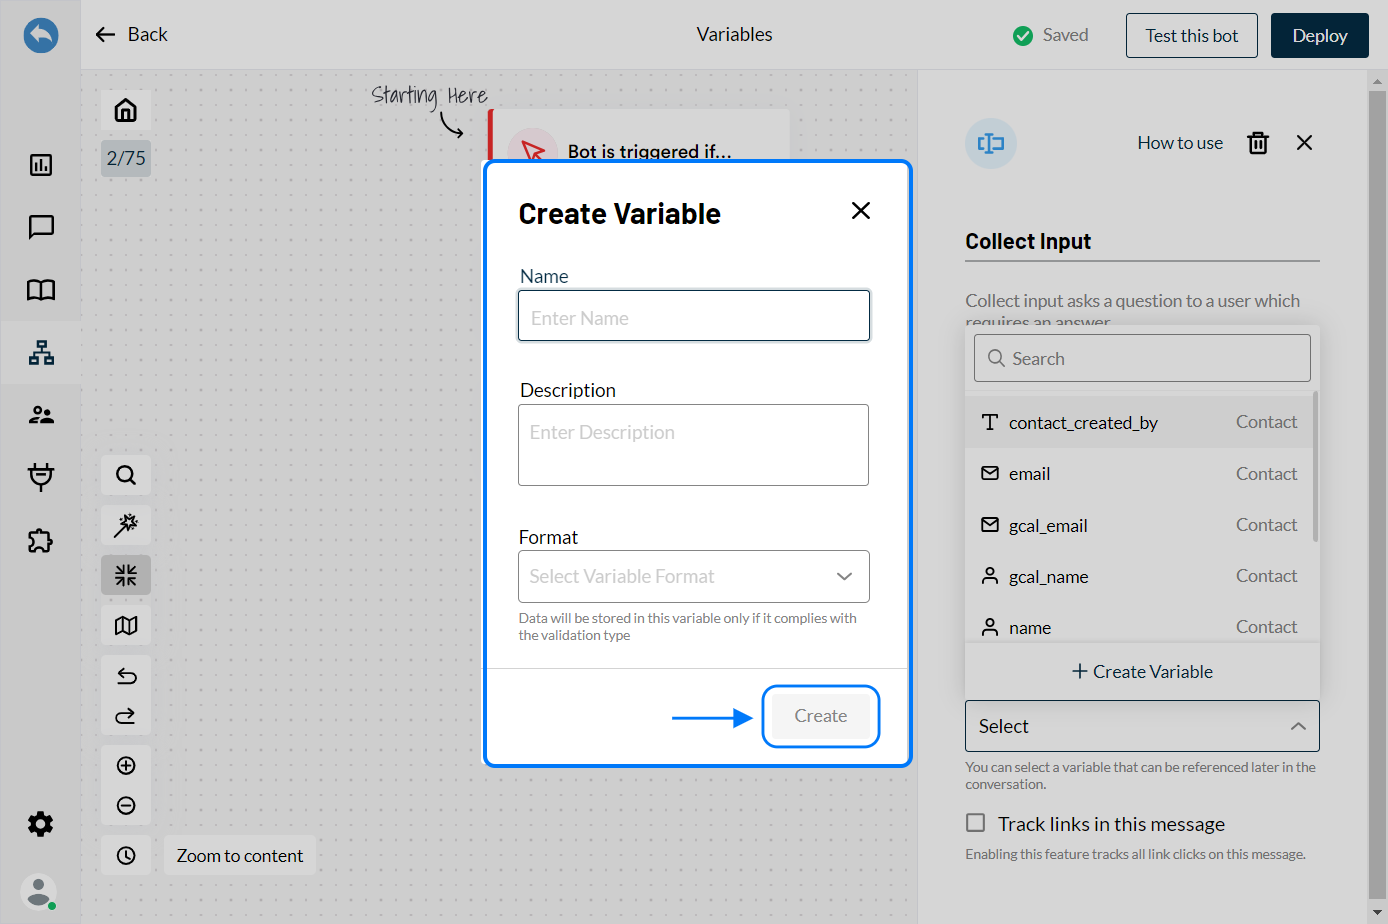
Configure the following and then click on 'Create' to create the variable.
- Name:
Provide the name of the variable. - Description:
Provide details about the variable in text editor as in what value it stores or what it is used for. - Validation/Format:
Select the format or the validation from the drop-down list as per your preference.
- Name:
Data is stored in the variable only it complies with the validation type
Using the variables to store the responses
We need to store responses in order to keep track of the visitor’s selection & sending data to CRMs.
This is possible on all the action blocks where we collect some form of input from the visitors i.e., either selecting the button or providing answers in the text box.
You can store the inputs in the variables by going into the action block and clicking on 'Save the response in this variable' & selecting from the list of available options.
Using the variable to personalize the experience of the visitors
This is possible on all the action blocks where you would like to personalize the message. To do so, you can open any action block & in rich text editor, type '#' to see the list of all variables (system, contact & conversation). Once the list is visible, you can select any variable and add it to the message.
Modify the existing variables
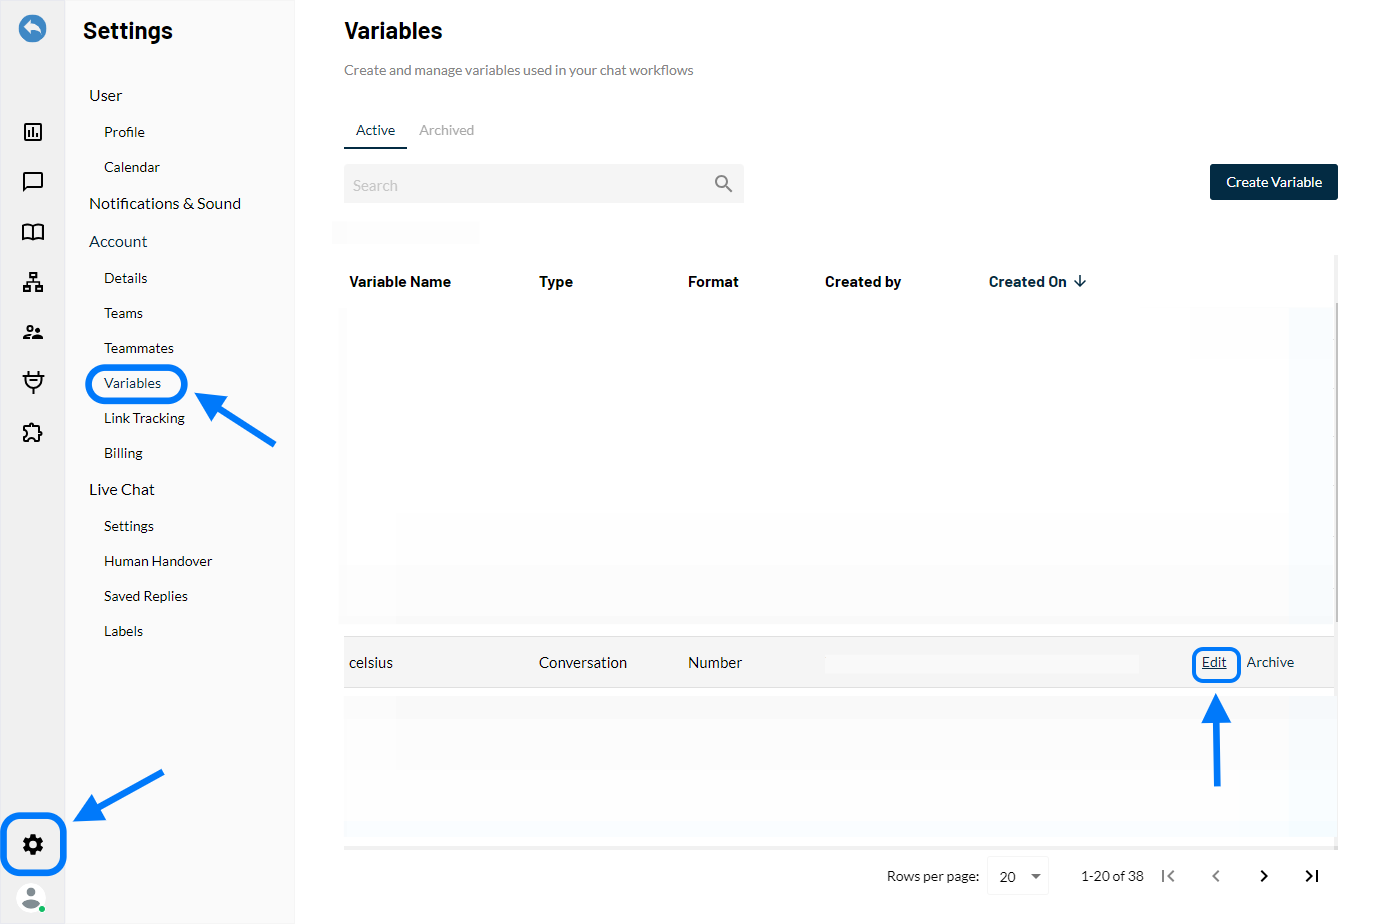
ReplyCX allows you to modify the description and validation / format of created contact or conversation variables. However, the name of the variable cannot be modified. In order to modify the details of the variable you can follow the following steps:
-
Go to ‘Setting → Variables’ and click on ‘Edit’ against the existing variable.
-
Update the description or validation of the variable and then click on 'Edit' to save the changes.

You cannot edit or modify system defined variables
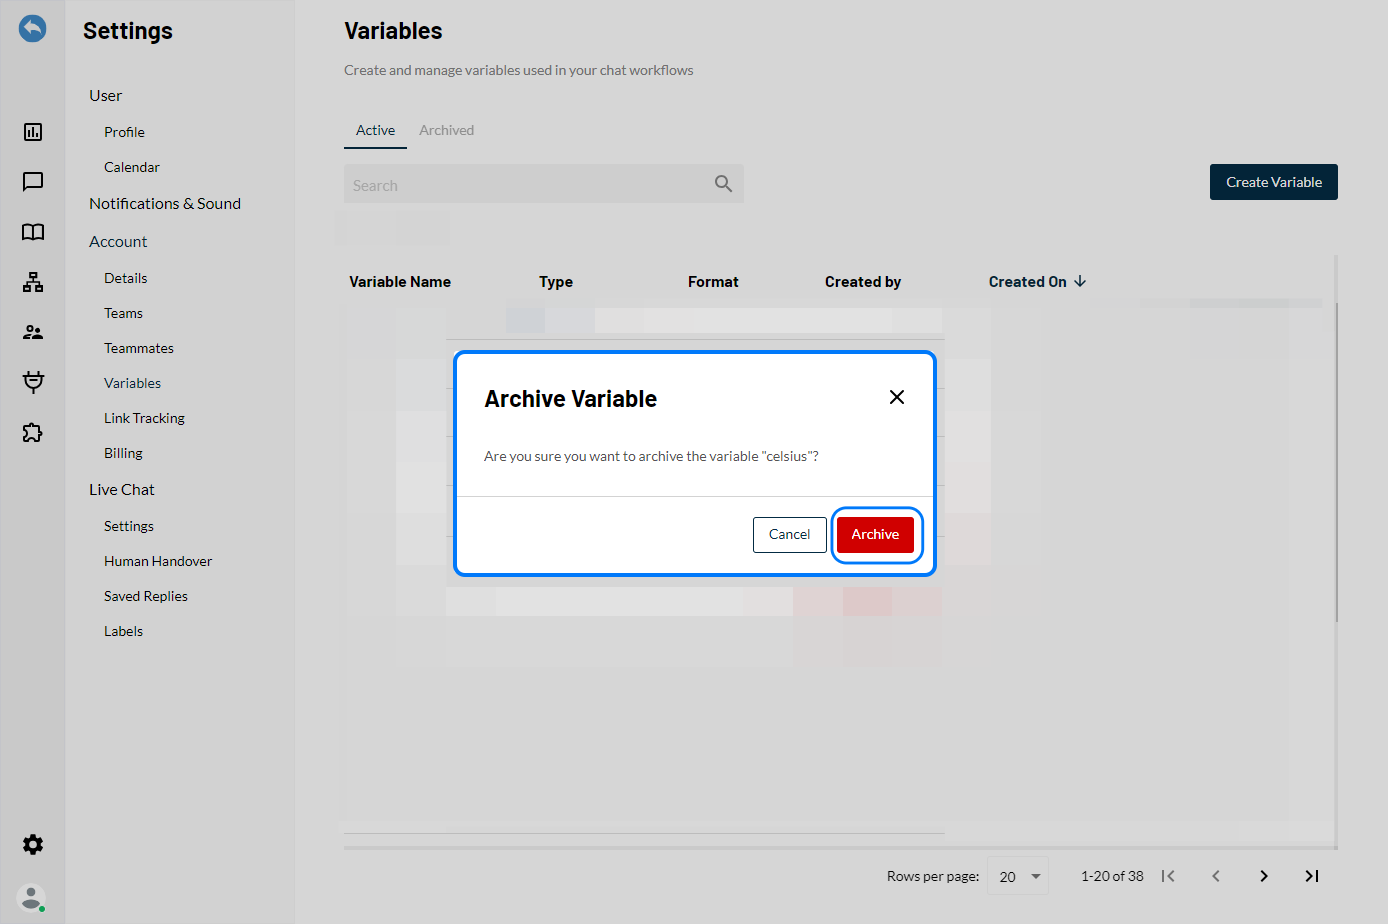
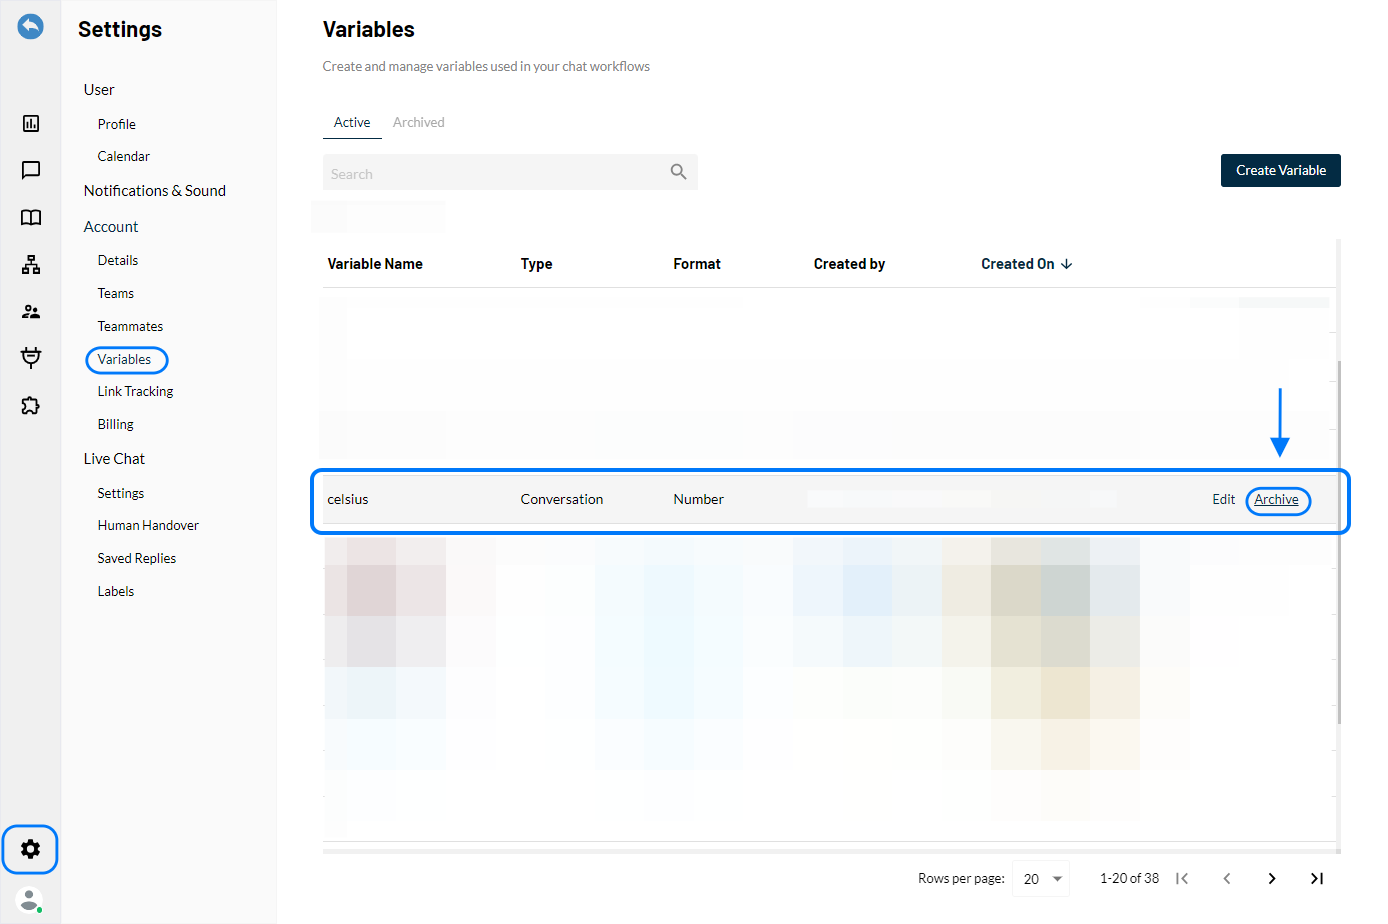
Archiving the variables not in use
On archiving the variables, it will not be visible in any of the drop downs of the bot builder or the contacts page however the values associated with it will remain as it is.
For an already deployed flow, value will not be captured for the archived variables. However, if they are containing any values, it will be replaced by fallback variables.
-
Go to ‘Settings → Variables’ and click on ‘Archive’ against the existing variable.
-
Click on ‘Archive’ again to confirm the action.