Airtable is a cloud-based database, similar to Google Sheets, for storing and managing data.
With this integration, you can fetch records from your Airtable database and dynamically display them as buttons, carousels, or image carousels in your chatbot.
Step 1: Connect your account:
First, connect your Airtable account either from the action panel or by going to the App Market.
A pop-up modal will appear, where you can grant permissions to the base you want to fetch records from.
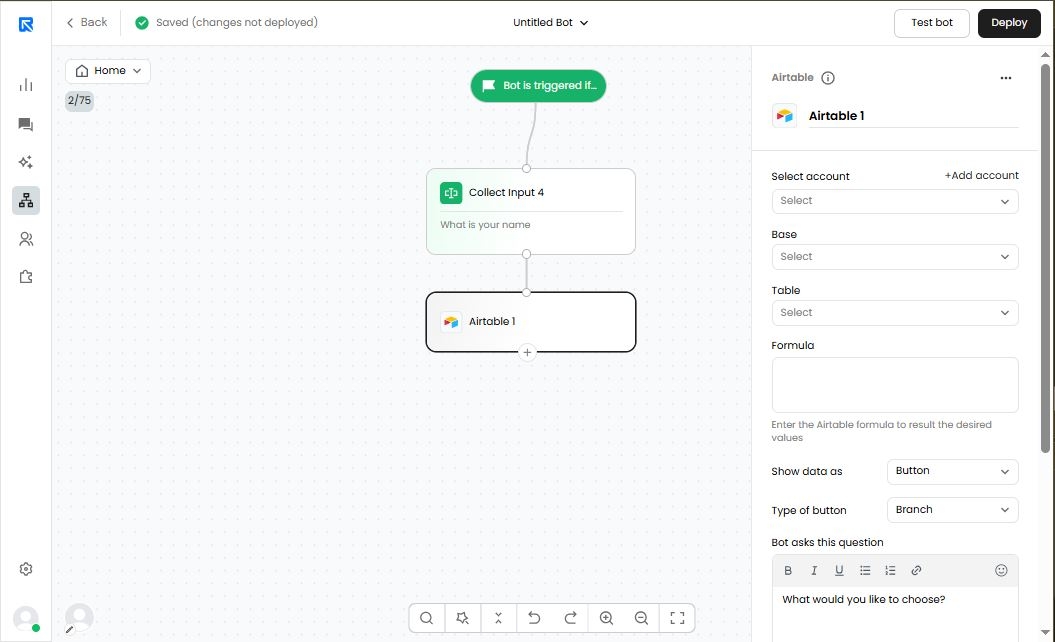
Step 2: Filter the records you want to fetch
Once your account is connected, select the base and table from which you want to fetch records.
Note: You will only see those bases for which you have granted permission during the authentication process. If you do not see your base, reconnect your account by visiting App Market > Airtable.
Next, set the filter criteria to apply when fetching records from the selected base and table.
The formula syntax follows the same format as Airtable's standard formula structure.
Learn more about Airtable formulas.
Step 3: Choose how to render the data
Based on the applied filter, records will be fetched from Airtable.
Next, choose how you’d like to render the data—either as buttons, a carousel, or an image carousel.
Note: Number of records fetched is determined on the formula you define.
Show Buttons:
You can render the data as either a Branch button or a URL button.
- Branch button – Navigates the user forward in the chat flow when clicked.
- URL button – Opens a URL when clicked.
Configuration steps:
- Define the question to display above the buttons.
- Select the Airtable column to use as the button text.
- If using URL buttons, select an additional Airtable column that contains the URL.
Show Carousel:
Render the data as a carousel with a series of cards.
- Map Cover Image to the Airtable field containing images.
- Map Title to the Airtable field for the card’s title.
- Map Description to the Airtable field for the card’s description (recommended: keep it within 2-3 lines for best readability).
- Configure actions for the buttons (up to 3 buttons per card).
- Define the variable where the visitor’s selection will be stored.
Show Image Carousel:
Display a set of images in a carousel format.
- Set Show data to Carousel.
- Map the Image field to the Airtable column that contains the image URLs.
Step 4: Store the selected value in a variable
After displaying the button or carousel, select a variable to store the visitor's selection:
- If a button is used, the button text will be saved.
- If a carousel is used, the carousel title will be saved.
- Image carousel does not support variable storage.
Limitations:
Airtable API has a limit of 5 requests per second per base.
Exceeding this limit will result in an error, and users will need to wait 30 seconds before trying again.