
ReplyCX's Google Calendar integration allows you and your team to connect within a single chat widget, offering customers an easier way to book appointments with the staff member of their choice. With instant access to availability slots across all accounts, time management has never been more efficient.
Applications:
- Collecting dates from visitors
- Appointment Booking
Configuration:
Google Calendar can be connected with ReplyCX in following ways:
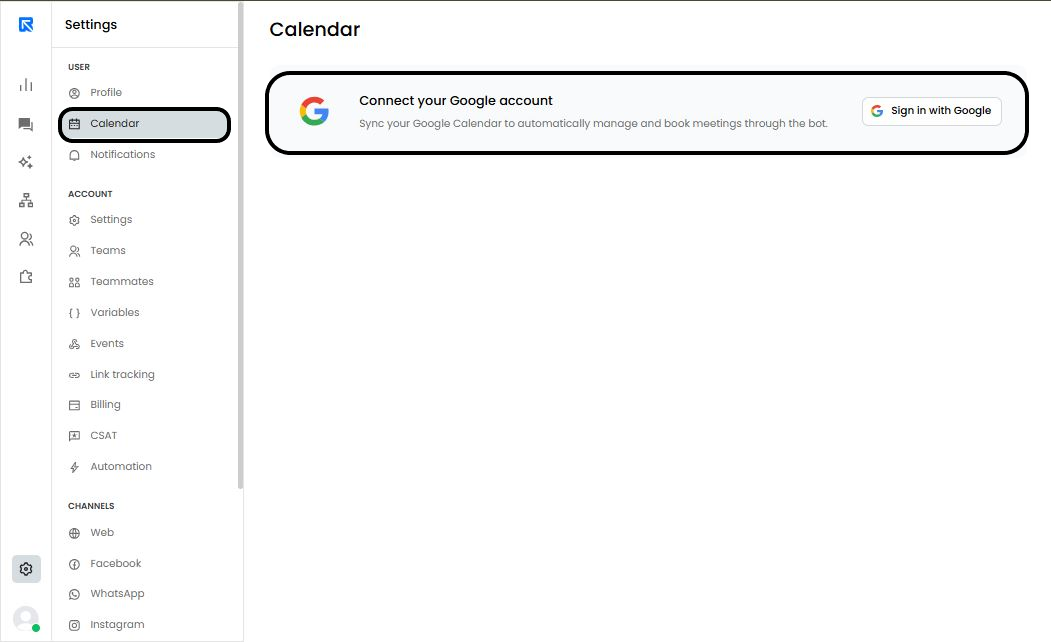
Through Settings:
-
Go to 'Settings -> User -> Calendar'.
-
Click on 'Sign in with Google' to connect your account.
Using Google Calendar Action Block
While in a chat bot flow, click on '+' to add the action block and configure your account.
Step 1: Add the action block on canvas by clicking on ‘+’.
Step 2: Choose Google Calendar.
Step 3: Configure the block on the right panel.
Click on 'Google Calendar' action block to open configuration panel on right side of the screen.
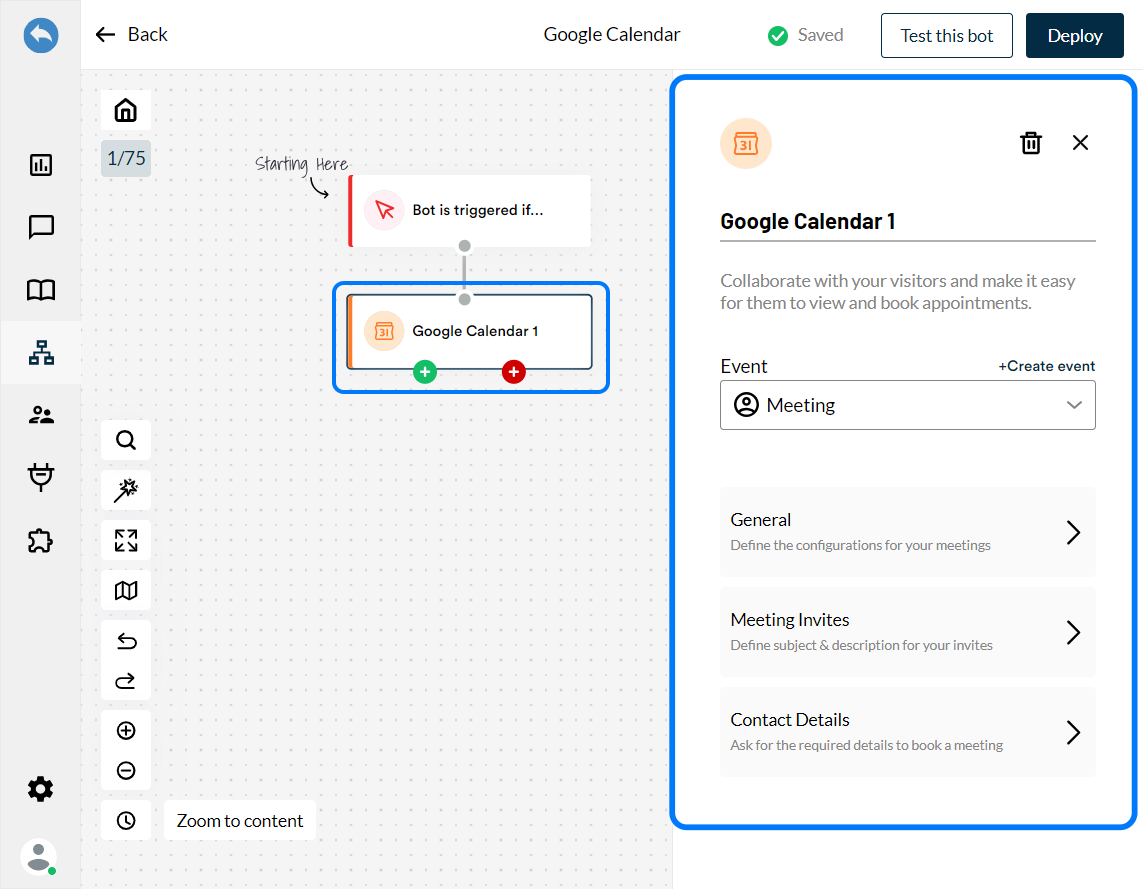
Setting up the Google Calendar function, requires to setup 3 functions:
-
Event:
Create a new event to configure or choose from the available events created in prior.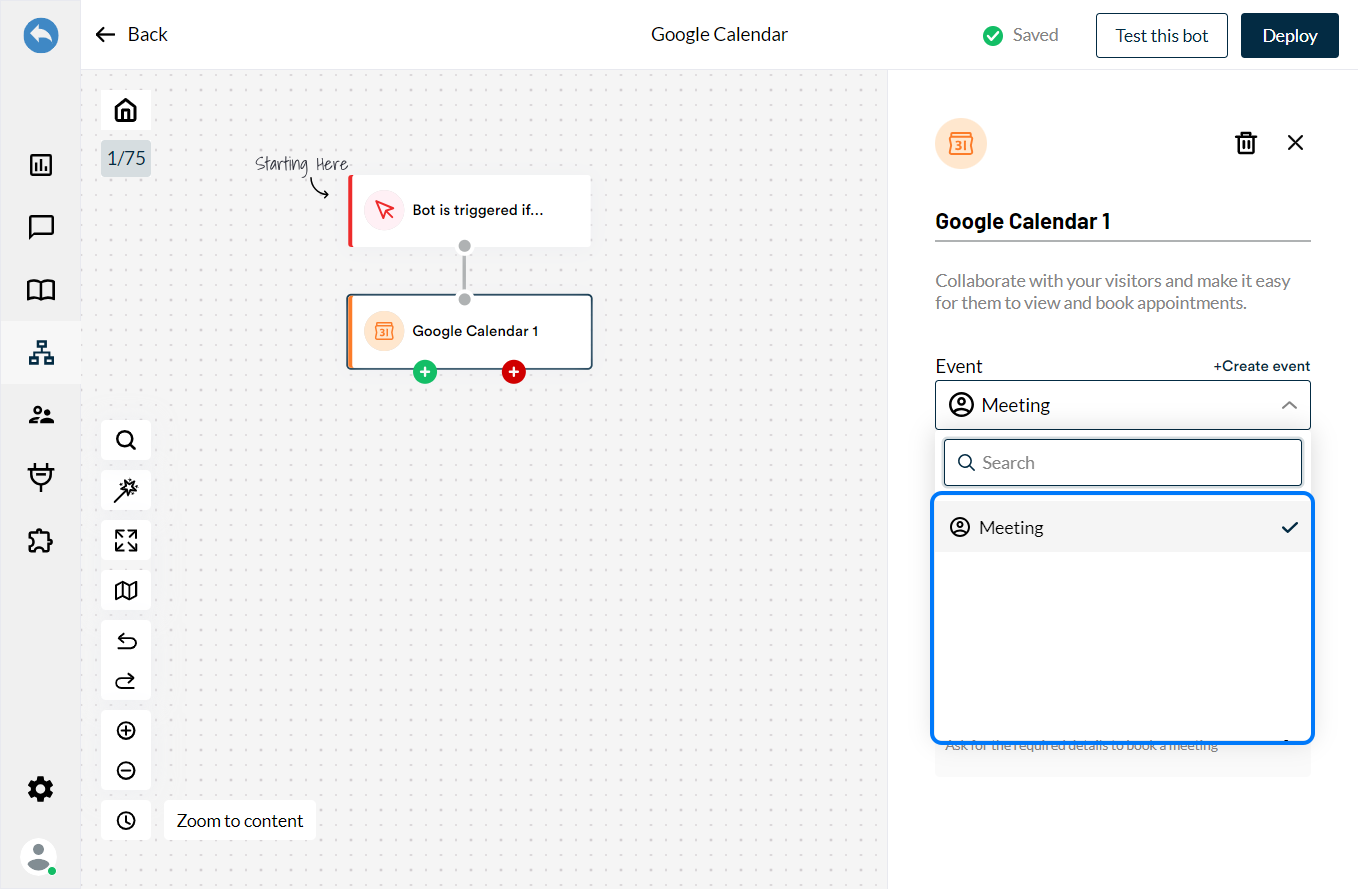
-
General:
Click on the General block to configure it.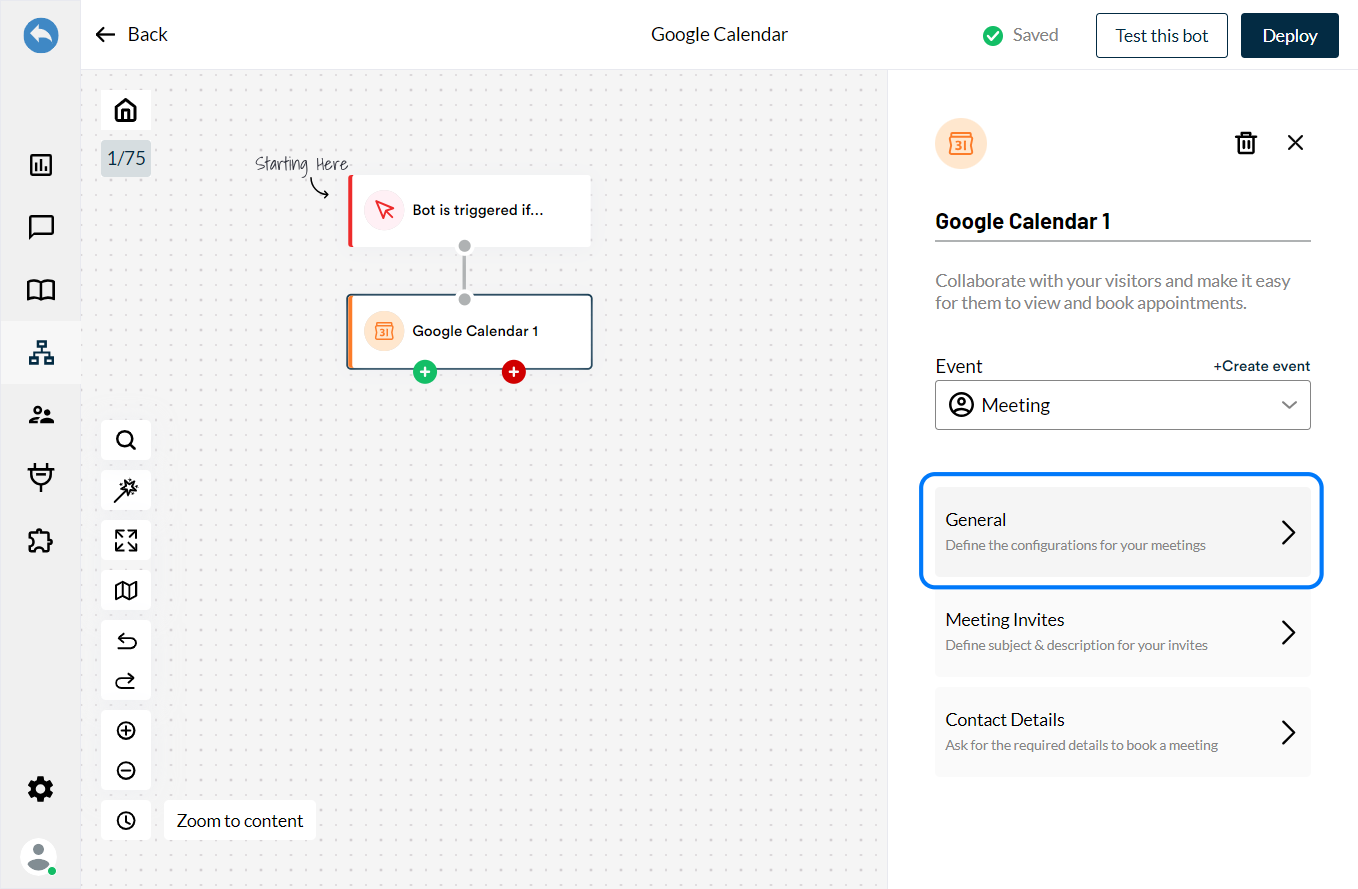
-
Slot Duration:
Here you can decide the duration of the meeting. Click on ‘Select the Slot Duration’ to select from the available options. You can set a minimum duration of 5 minutes and a maximum duration of 120 minutes.
-
Buffer Time:
Set a gap / break between your meeting slots. Click on ‘Buffer time between meetings’ to select from the available choices. You can a minimum buffer time of 5 minutes and maximum buffer time of 120 minutes. -
Notice:
Here you can set the reminder about your meeting. You can set the minutes in the space, before which you need to be notified about the scheduled meeting. -
Future Booking:
Google Calendar will display the slots to the visitors for the entire month by default. Check on the ‘Limit on future booking’ to limit this and define the number of calendar days where the slots need to be visible.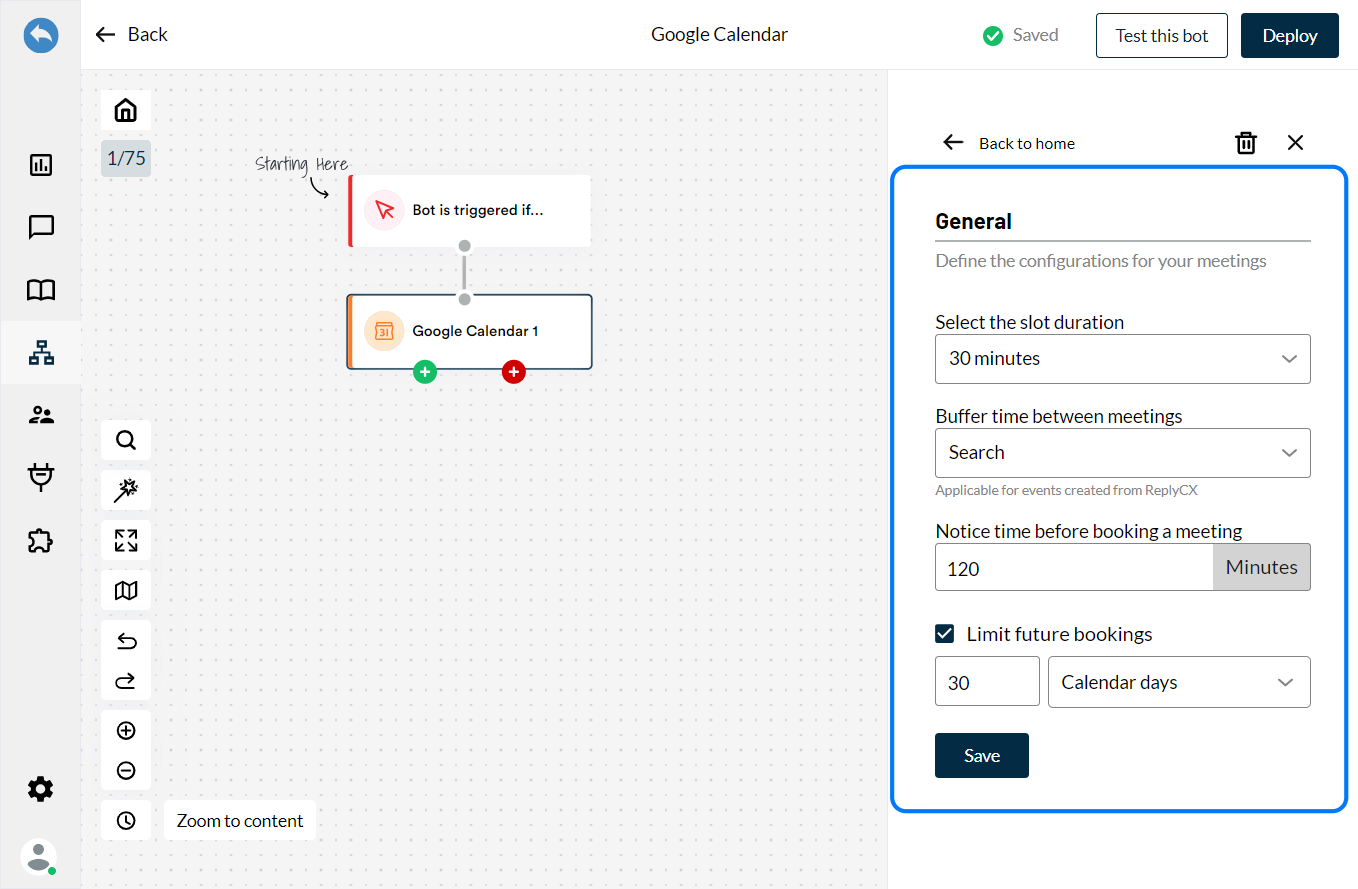
-
-
Meeting Invites:
Click on the 'Meeting Invites' button to configure the section.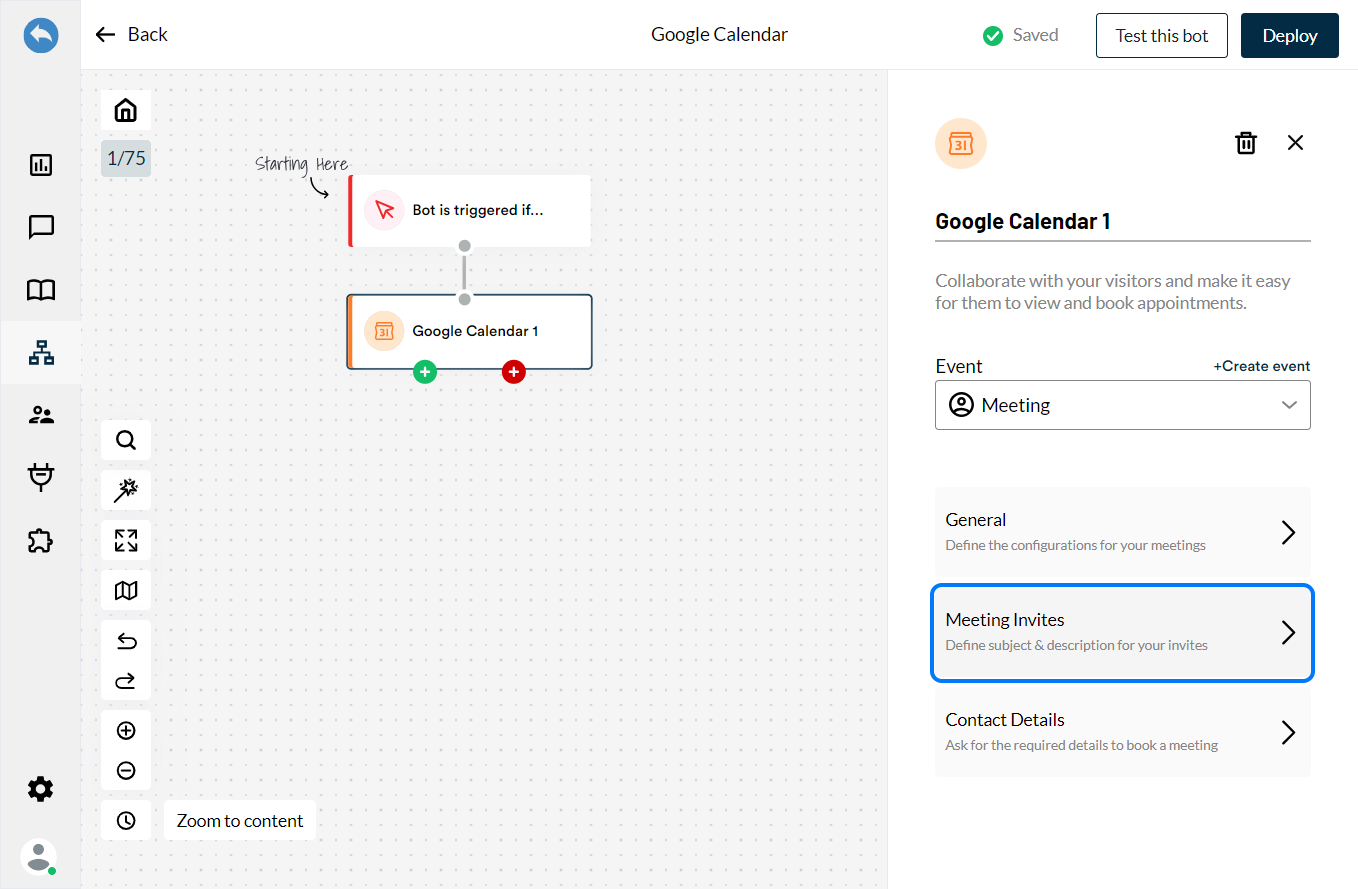
You can configure the following section:
-
Subject:
Define the subject of the meeting invite which will be sent to you as well as the visitors.
Use the variables to customize the subject line. -
Description:
Specify description in the field provided, with a little more information about meeting. -
Location:
Define the location where the meeting will be conducted. However, this option will be greyed out in case you have selected ‘Add a Google Meet link to your invite.’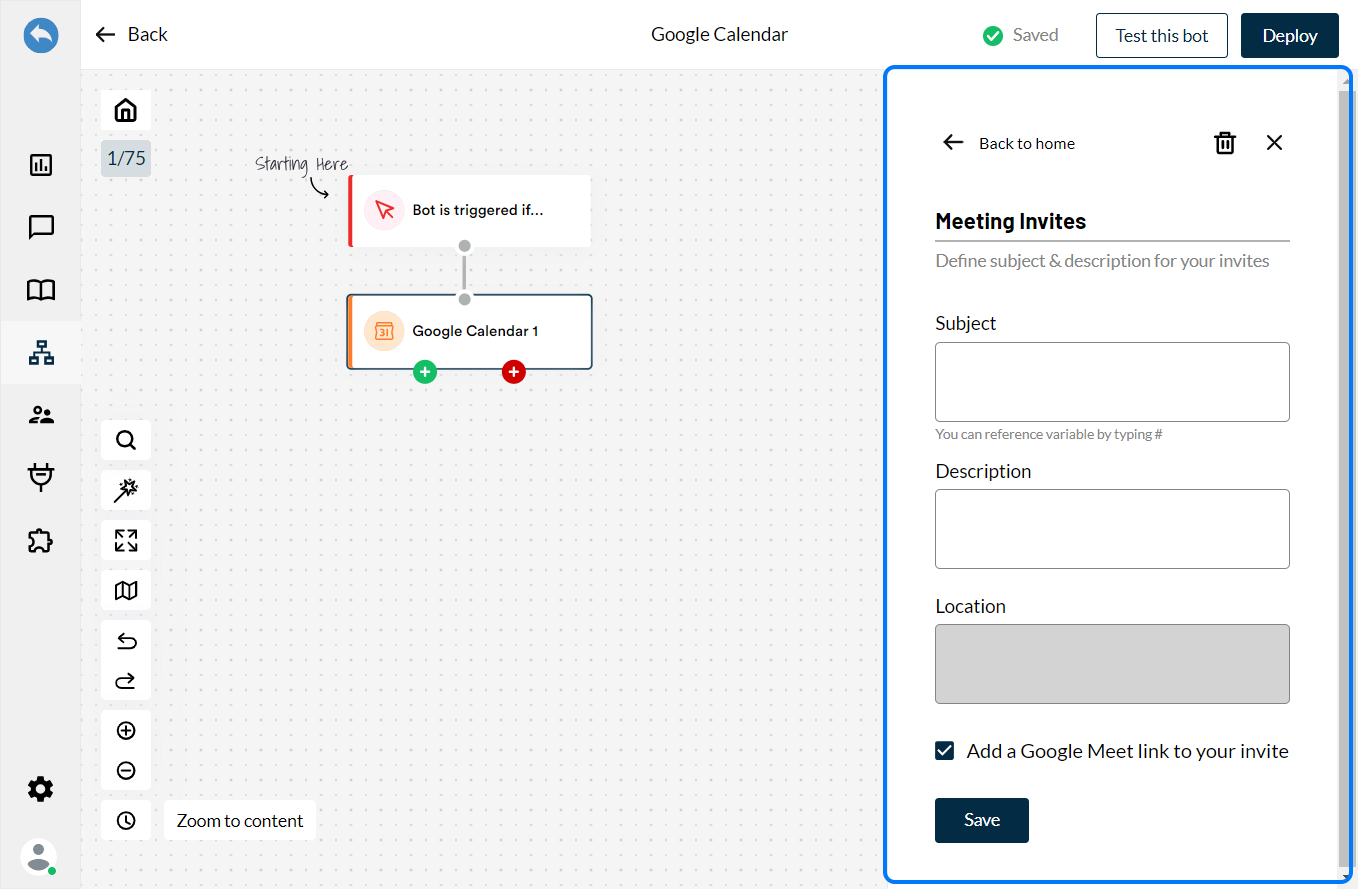
-
-
Contact Details:
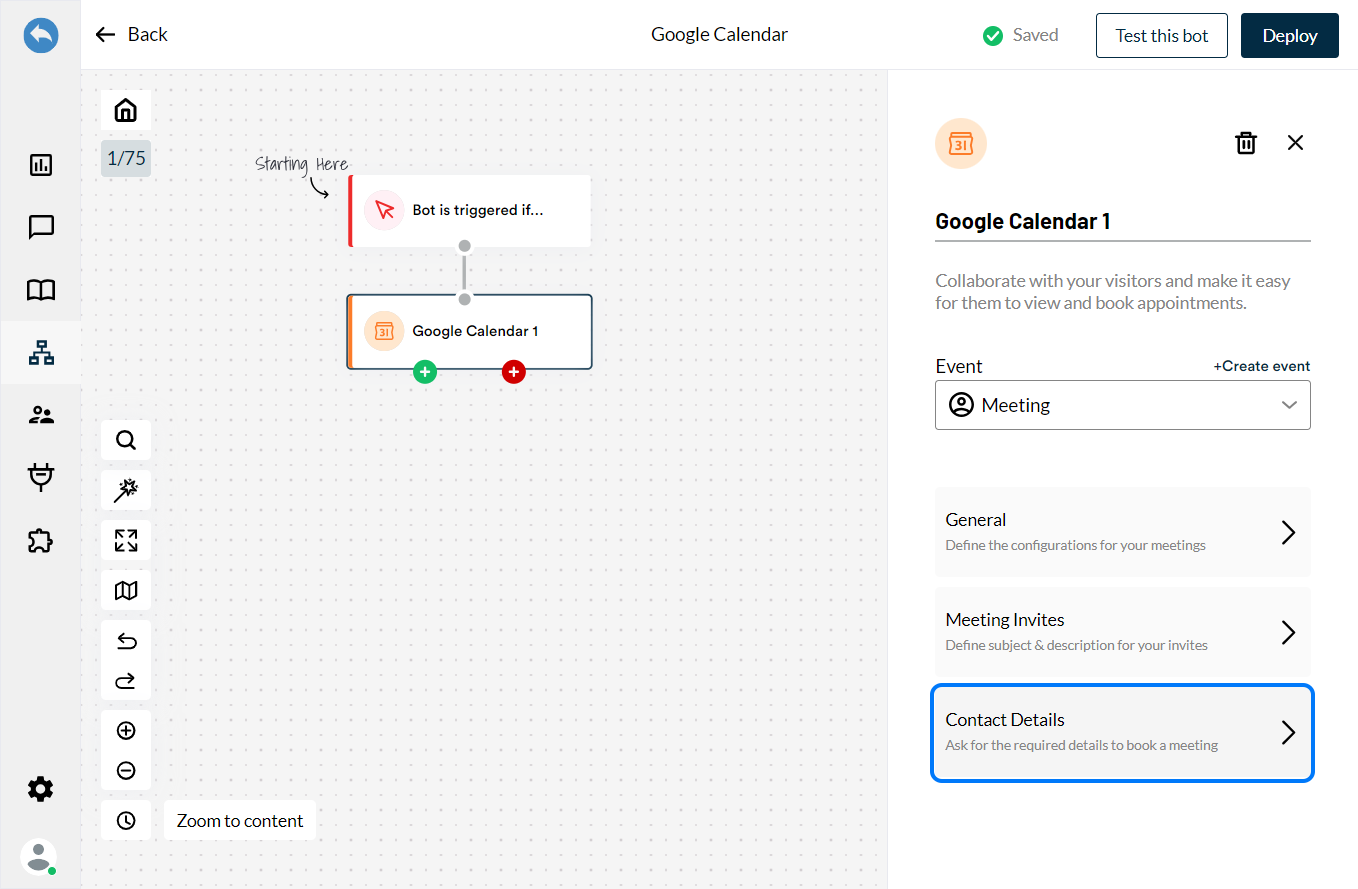
You can configure the following sections:
When you decide to book a meeting, the bot will request your Name and Email. But if we already have your information from earlier in the conversation, you can simply check 'Skip form if data is present' and save time by not having to provide the details again.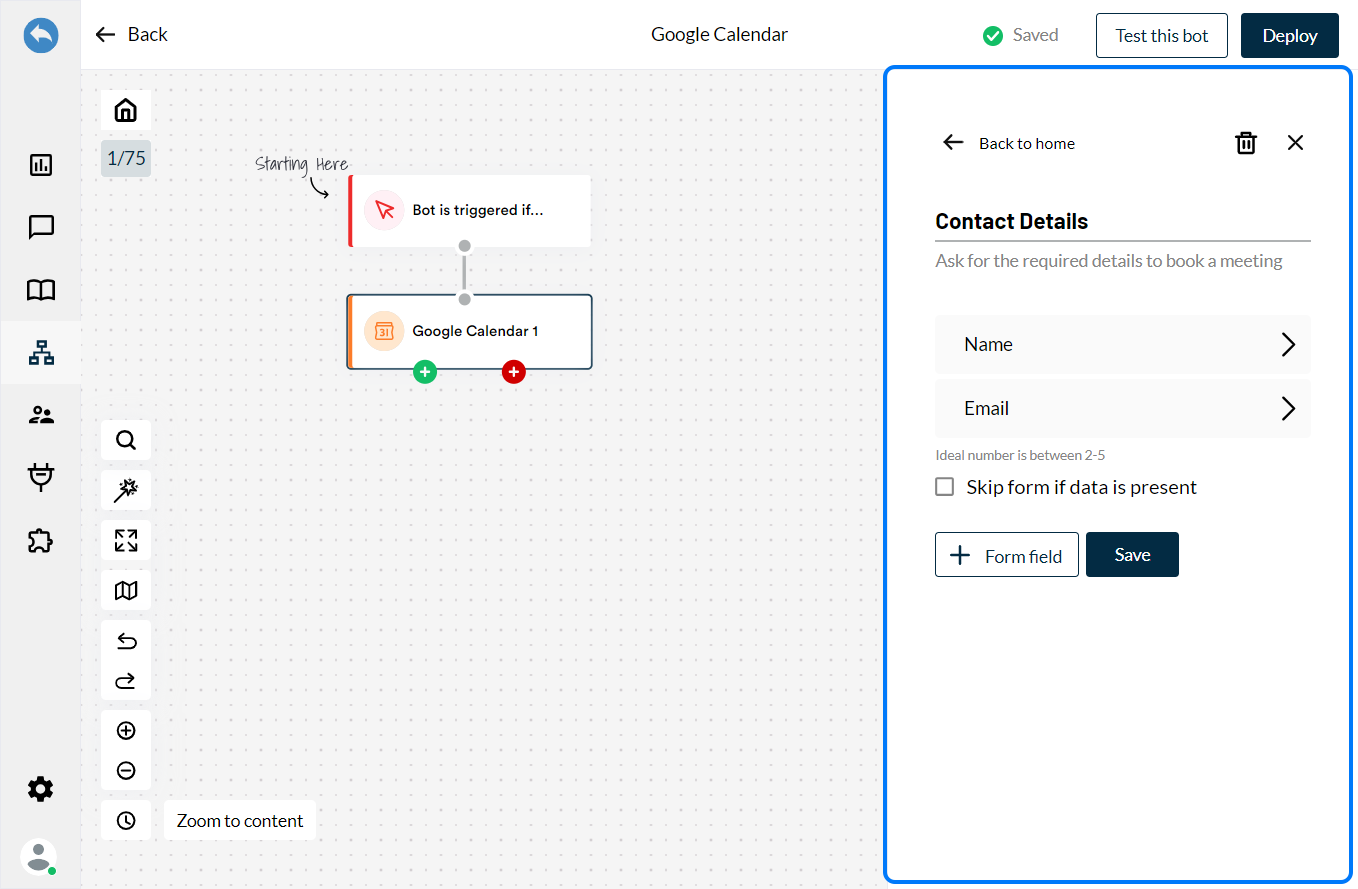
You can add more fields as well by clicking on ‘Form Field’ if you would like to collect more details from visitors. We suggest adding between 2 to 5 fields for the best results.